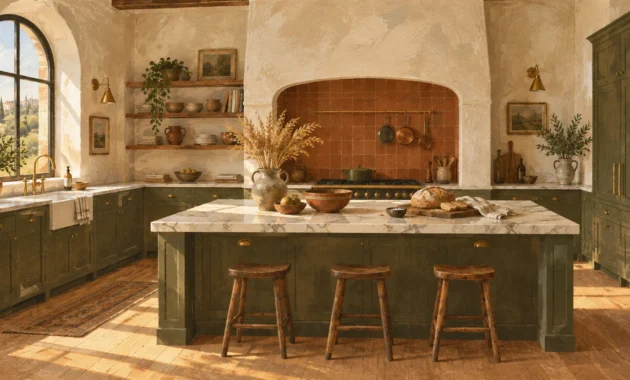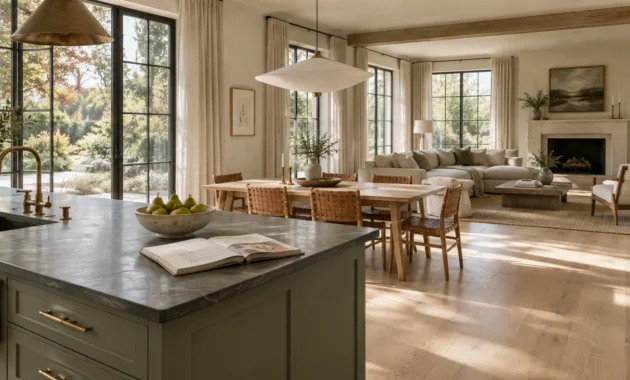
A kitchen island anchors your home, defining how you cook, gather, and entertain every day. Avoiding critical spatial and technical missteps ensures your kitchen investment delivers quiet luxury rather than enduring functional frustration.
Sophisticated kitchen island design requires harmonizing tailored architectural proportions with strict building regulations and ergonomic clearances. Overlooking these structural realities ruins the visual rhythm of adjoining open-concept living zones.
Mastering this centerpiece demands foresight, intentional material choices, and rigorous spatial awareness. Explore the essential kitchen island mistakes top interior designers avoid to guarantee a flawless, high-performing culinary layout.
Trend #1: Sacrificing Clearance Zones for Oversized Monoliths
Many homeowners crave an expansive statement island, yet an oversized footprint often suffocates your room. Restricting circulation turns a beautiful focal point into a daily spatial bottleneck.
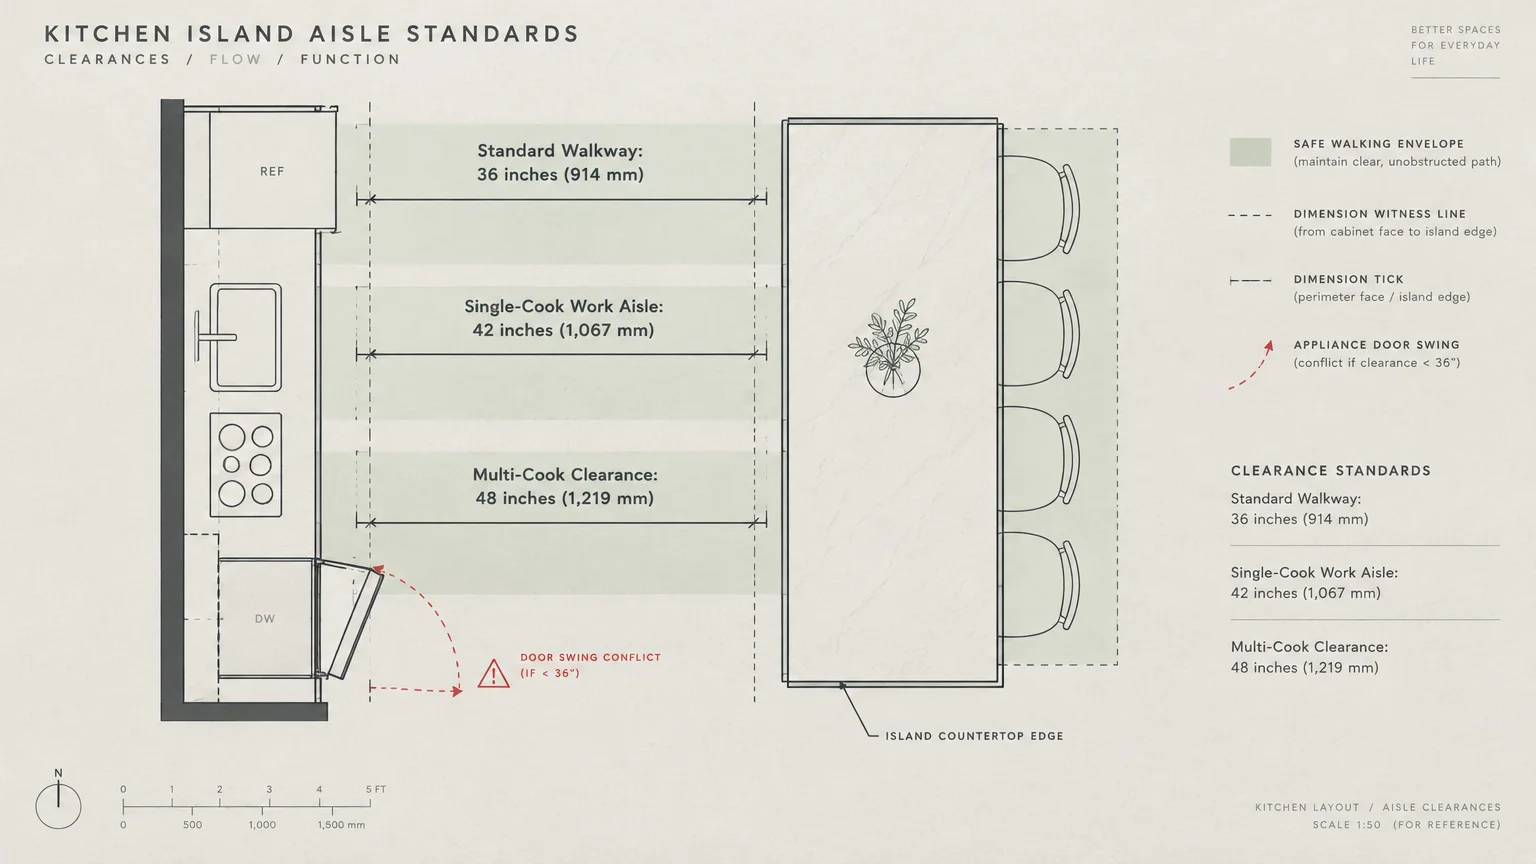
Professional kitchen island design hinges on distinct aisle clearances defined by the National Kitchen & Bath Association. You must differentiate between a simple walkway and an active work aisle.
A standard walkway without appliances requires a minimum clearance of 36 inches (914 mm). This dimension allows an individual to traverse the perimeter without feeling hemmed in by surrounding walls.
High-performance culinary zones demand substantially greater breathing room. A dedicated work aisle requires a minimum of 42 inches (1,067 mm) for a single cook.
In households with multiple cooks sharing prep tasks, that clearance expands to at least 48 inches (1,219 mm). These dimensions ensure you can open an oven or dishwasher door without colliding with another person.
Crucially, you must measure your aisles from the leading edge of overhanging countertops and appliance handles. Measuring between raw cabinet boxes creates a deceptive deficit of several functional inches.
Overlooking appliance door swings creates severe physical conflicts during daily meal preparation. An open dishwasher door extending into a cramped aisle completely blocks passage through your kitchen.
When seated diners occupy counter stools, they consume valuable aisle space. If an aisle measures only 36 inches, pulled-out stools choke the walkway completely down to an impassable barrier.
Visual bulk also distorts the sightlines of neighboring open-concept dining rooms. An overscaled island overpowers soft seating arrangements and disrupts natural flooring transitions.
Select an island footprint that honors the architectural volume of your home. Negative space provides an undeniable air of luxury, granting your kitchen layout effortless fluidity.
Consider the vertical proportions of your room alongside the horizontal square footage. Soaring ceilings can handle a more grounded base, whereas standard ceilings require visual lightness.
Leaving generous perimeters preserves uninterrupted visual lines into adjacent living areas. You achieve a welcoming, open atmosphere that feels curated rather than crowded.
Test your dimensions on site before finalizing custom cabinetry orders. Taping out the true perimeter on your subfloor reveals true spatial dynamics in real time.
If space feels tight during mockups, scale back your island dimensions with confidence. Generous circulation always feels more luxurious than an extra foot of crowded cabinetry.
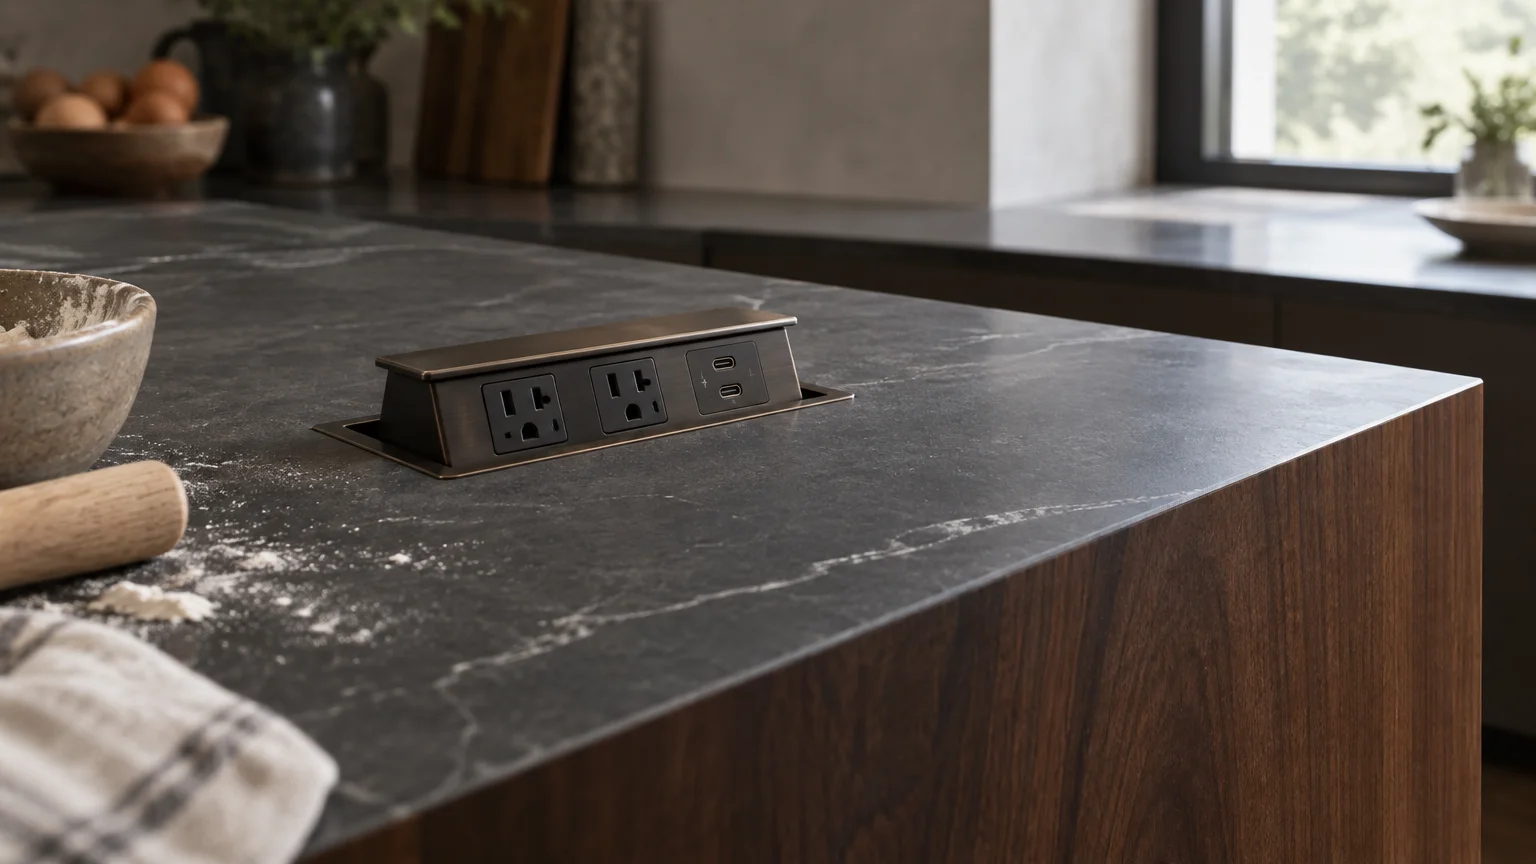
Trend #2: Ignoring Updated Electrical Placement and Safety Codes
Outdated installation habits frequently collide with modern residential building regulations. Installing standard power outlets on the vertical end panels of an island represents an obsolete and dangerous design practice.
The 2023 and 2026 National Electrical Code (NEC Section 210.52(C)) strictly prohibits receptacles below the countertop on islands and peninsulas. This rule prevents catastrophic burn injuries caused when children or pets pull on dangling appliance cords.
Designers must specify approved receptacle positions that preserve pristine millwork without violating safety mandates. You can install outlets on or above the countertop up to a maximum of 20 inches above the work surface.
Architectural vertical risers and integrated splashguards provide practical planes for these elevated fixtures. They maintain code compliance while keeping power cords safely resting across the stone deck.
Alternatively, flush countertop assemblies offer a discreet, minimalist solution for stone surfaces. You can integrate listed pop-up receptacles designed specifically to resist liquid spills and mechanical wear.
The 2026 NEC clarifies that standard wall receptacles must sit at least 24 inches below countertops. This height restriction prevents standard two-foot appliance cords from reaching lower power sources.
Active electrical receptacles on an island are now technically optional under recent building codes. However, local jurisdictions still legally mandate electrical provisions for potential future installations.
Your contractor must run a capped electrical circuit to an interior junction box inside the island cabinetry. This ensures future occupants can activate power sources without tearing into finished flooring.
Plan conduit pathways through concrete slabs or subfloors well before pouring foundations or installing stone flooring. Relocating electrical feeds after tile installation causes costly delays and structural compromises.
You can also incorporate specialized charging drawers equipped with certified safety shutoff switches. These mechanisms cut power automatically whenever the drawer closes, safely concealing phones and tablets.
Waterfall stone edges demand particular foresight regarding electrical placement. Cutting junction boxes through fragile, bookmatched marble end slabs often weakens stone stability and destroys aesthetic flow.
Consult your licensed electrical contractor early during the schematic phase of your project. Aligning your aesthetic vision with current code safeguards your investment from failed inspections.
Embrace these safety requirements early during schematic planning. You will safeguard your family while preserving the flawless, unbroken facade of custom fluted timber or reeded millwork.
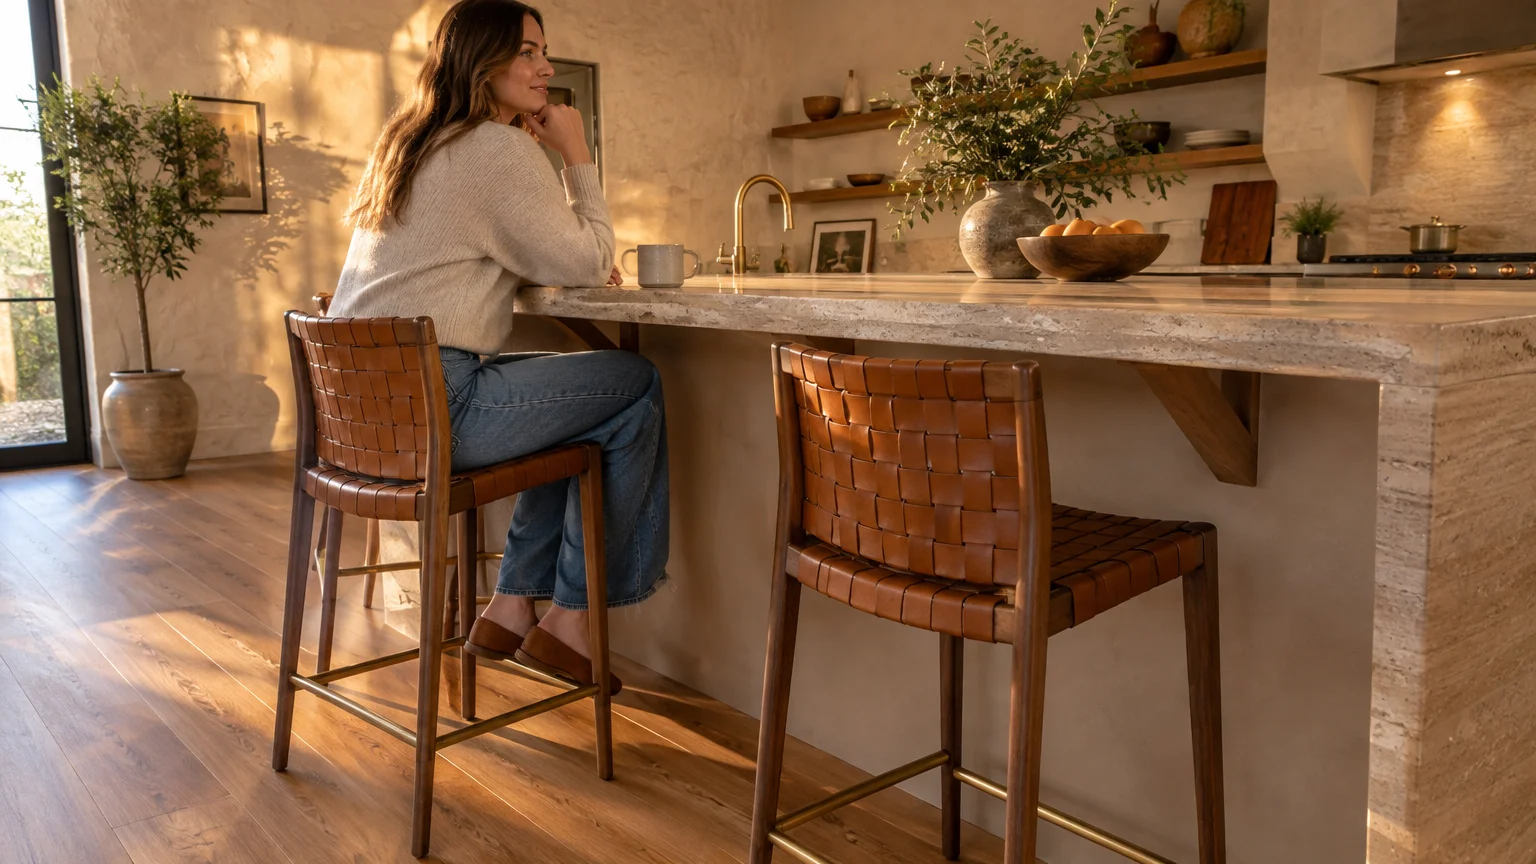
Trend #3: Misjudging Seating Ergonomics and Counter Overhangs
Island seating fosters relaxed connection, but inadequate overhang depths quickly cause physical discomfort. Forcing guests to sit sideways ruins the hospitable intent of an informal dining counter.
Proper knee depth directly correlates with the overall height of your island installation. The National Kitchen & Bath Association provides definitive clearances for every standard counter elevation.
For a standard 36-inch-high island counter, you must provide a minimum clear knee depth of 15 inches. Anything shallower forces seated diners to bang their knees directly against raw cabinet backs.
If you design a lower 30-inch-high counter at table height, increase knee clearance to 18 inches. Taller 42-inch bar-height perimeters require a minimum depth of 12 inches for comfortable posture.
In addition to depth, respect the necessary horizontal elbow room along the perimeter. Provide at least 24 inches of linear counter width for every seated guest.
Crowding four barstools into a span suited for three diminishes your entertaining experience. Restraint creates an inviting ambiance reminiscent of a tailored luxury lounge.
Clearance behind seated guests represents another critical ergonomic consideration. Allow at least 32 inches of clearance behind diners when no pedestrian traffic passes behind them.
When family members need to edge past seated guests, expand that clearance to 36 inches. For effortless, unobstructed walking traffic behind stools, maintain 44 inches of dedicated clearance.
Substantial cantilevered stone overhangs also require hidden structural steel brackets. Concealing these supports beneath the slab protects your stone from cracking while preserving clean legroom underneath.
Avoid bulky decorative corbels that project downward into your guests’ leg space. Modern flush steel plates deliver exceptional load-bearing strength without bruising knees or cluttering visual lines.
Select stool silhouettes that tuck fully beneath the counter when not in use. Backless or low-profile stools preserve clean horizontal sightlines toward adjoining dining and living areas.
Consider the tactile experience of footrests and seat materials for extended dining comfort. Upholstered leather or textured bouclé cushions soften stone expanses while inviting prolonged, leisurely conversation.
Ergonomic foresight guarantees that your island functions as an authentic social hub. Proper dimensions make entertaining effortless, keeping guests comfortable from morning coffee through late-night dinner parties.
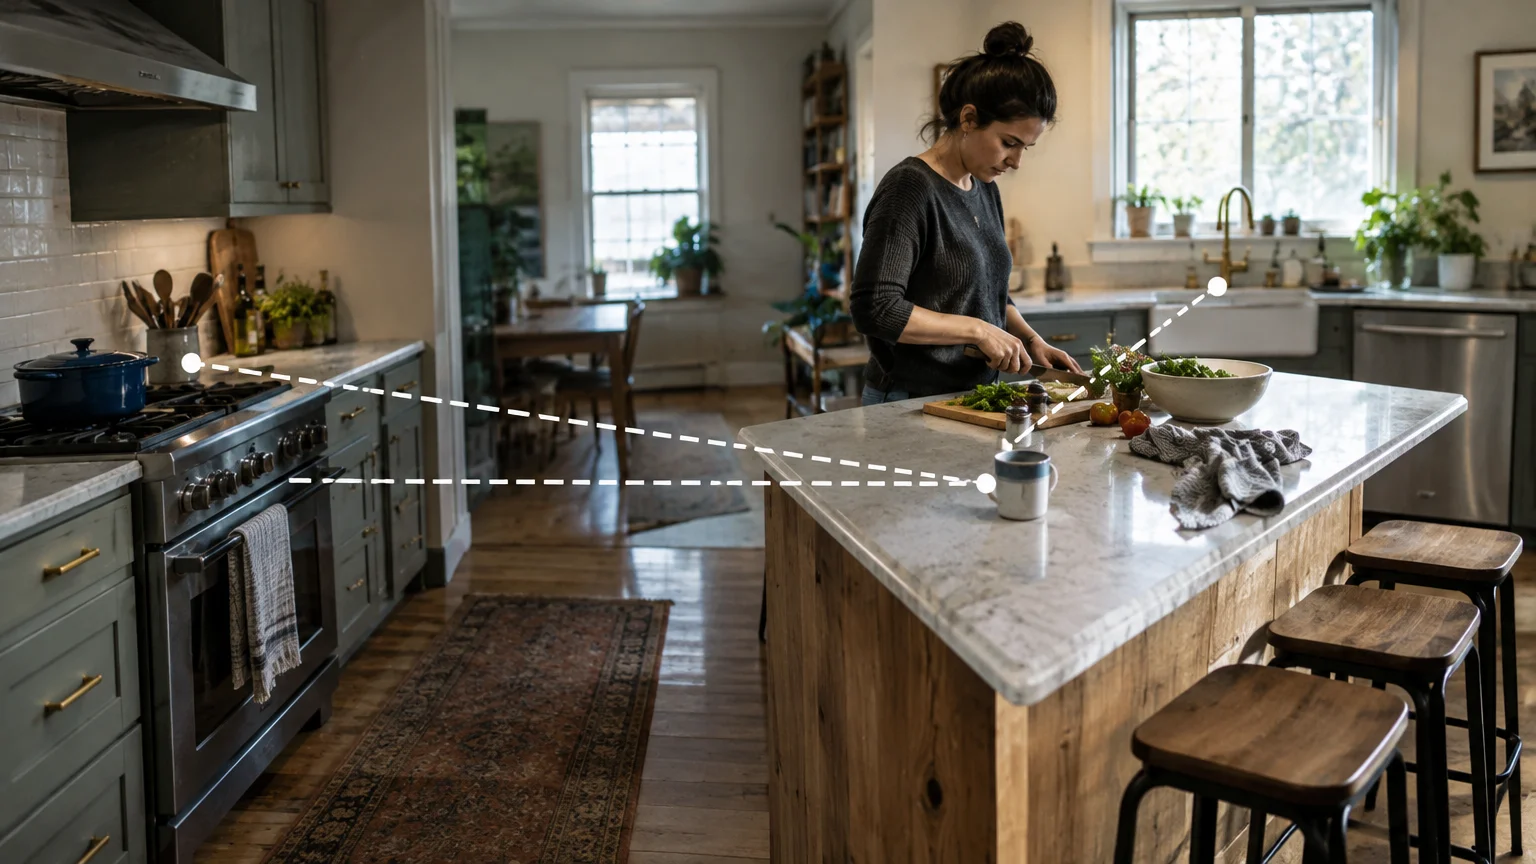
Trend #4: Severing the Primary Kitchen Work Triangle
The golden triangle between the sink, refrigerator, and primary cooking surface remains an indispensable spatial principle. Inserting a massive island directly across these paths creates exhausting everyday friction.
According to established NKBA planning guidelines, an island must not intersect any work triangle leg by more than 12 inches (305 mm). Severe intrusions turn simple meal preparation into an obstacle course.
Designers refer to poorly positioned structures as barrier islands because they block direct prep pathways. You should never walk around an expansive stone monolith just to retrieve butter from the refrigerator.
Maintain continuous, unobstructed paths between your food storage and primary prep zones. Efficient flow reduces physical fatigue and establishes an intuitive rhythm in your culinary environment.
Refrigerator placement requires dedicated landing space directly adjacent to the appliance door. If your island sits too far away, transferring heavy groceries or cold ingredients becomes awkward and inefficient.
If your kitchen footprint necessitates a broad island, establish dedicated secondary workstations. Installing an auxiliary prep sink on the island preserves the integrity of your main cooking triangle.
Placing a secondary sink on the island creates a self-contained prep hub. This setup allows multiple cooks to chop and rinse without stepping into the main cleanup zone.
Locate integrated waste and recycling pullouts immediately adjacent to your primary prep sink. This ergonomic positioning lets you scrape cutting boards directly into the bin without crossing aisles.
Consider how opened appliance doors affect these functional pathways during peak entertaining hours. Refrigerator columns and integrated dishwashers must swing wide without blocking your primary prep counters.
In expansive luxury residences, consider a double-island layout to solve flow bottlenecks. Dedicate one island entirely to culinary prep while reserving the second for drinks and casual dining.
Align functional zones to create a natural transition toward formal dining spaces. Keeping cleanup stations visually screened maintains an elegant ambiance throughout dinner parties.
Thoughtful kitchen island design orchestrates movement with balletic precision. Prioritize intuitive ergonomics over sheer surface area to guarantee effortless daily living.
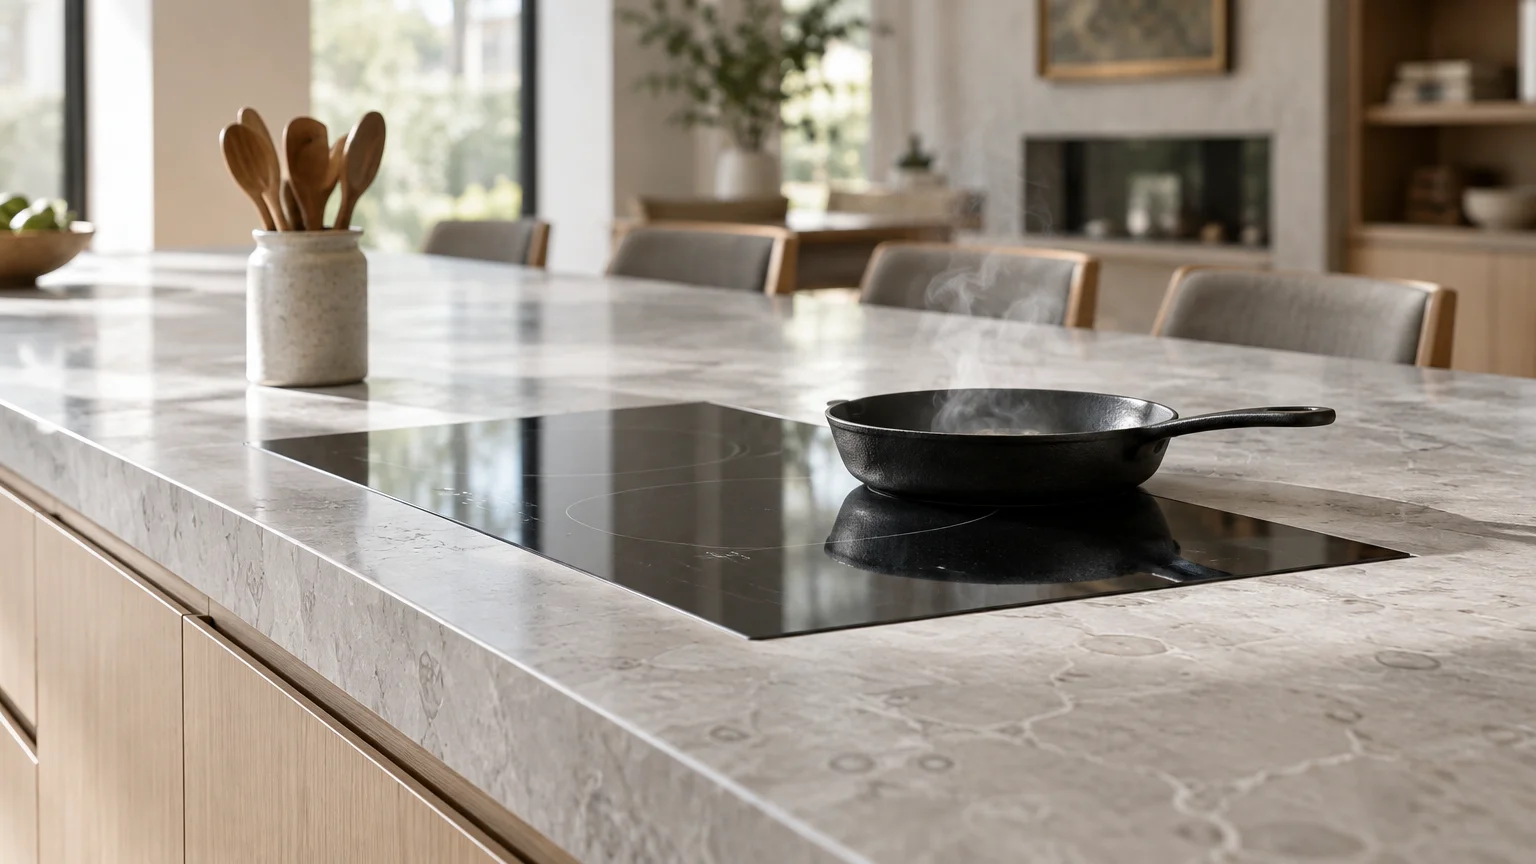
Trend #5: Overlooking Cooktop Buffers and Splatter Margins
Centering a gas cooktop or induction surface on your island encourages social cooking, but safety often suffers. Without sufficient perimeter margins, hot grease and boiling liquids threaten adjacent guests.
The NKBA recommends extending flat countertops at least 9 inches behind any island cooking surface. This safety buffer shields seated diners from unexpected splatters and accidental contact with hot cookware.
Neglecting this safety margin creates a hazardous dining environment directly behind active burners. Guests instinctively recoil from sizzling pans, undermining the convivial spirit of your island.
Induction technology provides a significantly safer alternative to open gas flames on an island surface. Induction cooktops generate heat only within magnetic cookware, leaving adjacent stone decks remarkably cool to the touch.
When turned off, smooth induction glass doubles as seamless prep space for entertaining platters. This dual functionality proves invaluable when staging buffet-style dining for large gatherings.
Ventilation presents another complex hurdle when locating cooking appliances away from perimeter walls. Overhead range hoods can obstruct panoramic garden views and bisect sightlines into dining rooms.
Downdraft extractors integrated flush into induction cooktops offer an elegant architectural remedy. They pull grease and moisture downward, keeping sightlines clear and open toward adjoining living spaces.
Ensure you map downdraft ductwork early to avoid conflicts with floor joists or underfloor plumbing. Efficient duct runs ensure powerful airflow without generating disruptive acoustic hums during dinner parties.
If you prefer an overhead extraction canopy, treat it as a sculptural design feature. Clad the hood in plaster or patinated metal to mirror the organic materials found in your living areas.
Avoid positioning island cooktops near exterior draft zones like sliding patio doors. Strong cross-breezes disrupt gas flames, decrease extraction efficiency, and carry cooking odors into neighboring lounge areas.
Consider biophilic ventilation systems that quietly capture particulate matter. High-volume filtration protects your home furnishings from stubborn culinary odors and ambient grease film.
Careful planning balances social engagement with rigorous culinary safety. Protect your entertaining zones while crafting an inspiring platform for gastronomic creativity.
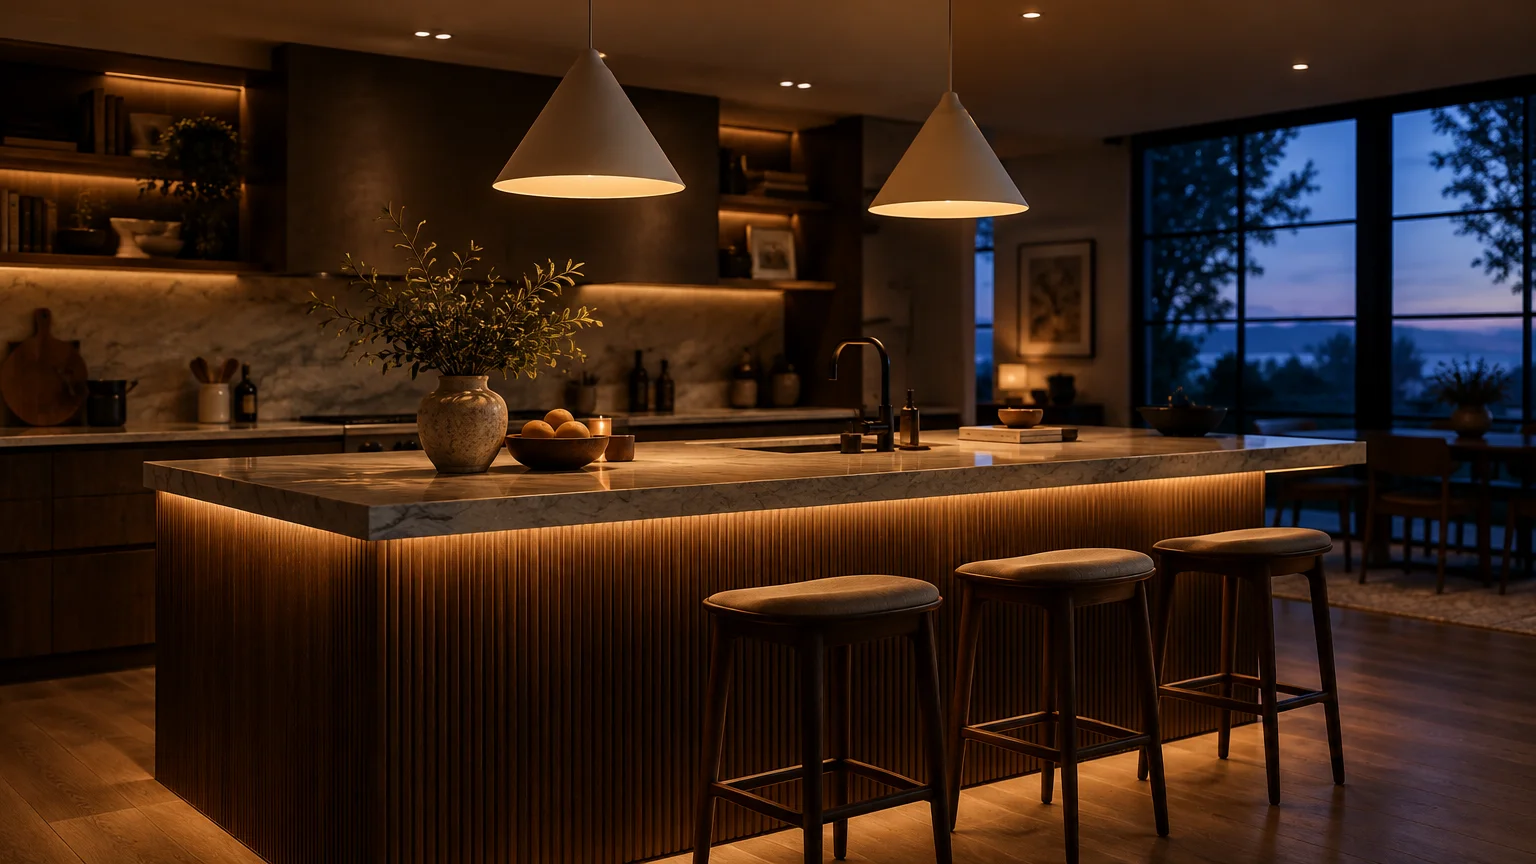
Trend #6: Relying on Monotonal, Unlayered Lighting Schemes
An island illuminated solely by a row of generic downlights feels harsh and utilitarian. Designers know that a single lighting layer flattens textures and casts deep facial shadows across seated guests.
Create visual intrigue by weaving ambient, task, and accent lighting into a singular illumination plan. Layered light transforms your functional workspace into a welcoming evening retreat.
Pendant fixtures serve as jewelry for the kitchen, establishing focal balance above expansive counters. However, hung at incorrect heights, pendants either blind seated diners or obstruct sightlines entirely.
Position the bottom of your pendant shades roughly 30 to 36 inches above the finished countertop. This hanging elevation provides targeted task illumination while preserving clear eye contact across the room.
Consider the opacity of your pendant shades to manage ambient glare effectively. Solid ceramic or metal shades direct focused light downward onto prep surfaces without washing out dining areas.
Translucent glass fixtures provide broad ambient glow but require low-wattage bulbs to avoid harsh glare. Pairing frosted diffusers with exposed filaments yields warm, flattering light for evening gatherings.
Incorporate hidden architectural linear LEDs beneath the island countertop overhang or along the toe-kick. Soft plinth lighting casts a gentle wash across timber or stone flooring, creating a floating effect.
Specify warm-dimming LED drivers that shift color temperature smoothly from functional daytime clarity to candlelight warmth. Lower color temperatures relax guests and complement intimate dinner settings.
Install responsive dimmer switches to orchestrate effortless ambiance transitions throughout the day. Bright, crisp task illumination suits morning food prep, while soft, warm hues enhance evening dinner parties.
Align the finish of your light fixtures with decorative accents in adjacent dining and living spaces. Cohesive metal finishes like unlacquered brass or blackened bronze unite distinct functional zones.
Use narrow-beam directional downlights focused specifically on stone surfaces rather than general circulation paths. Grazing light across textured marble or fluted millwork highlights tactile craftsmanship beautifully.
Dynamic lighting accentuates rich marble veining and artisan woodwork. Intentional illumination elevates your island from a basic prep counter into an atmospheric work of art.
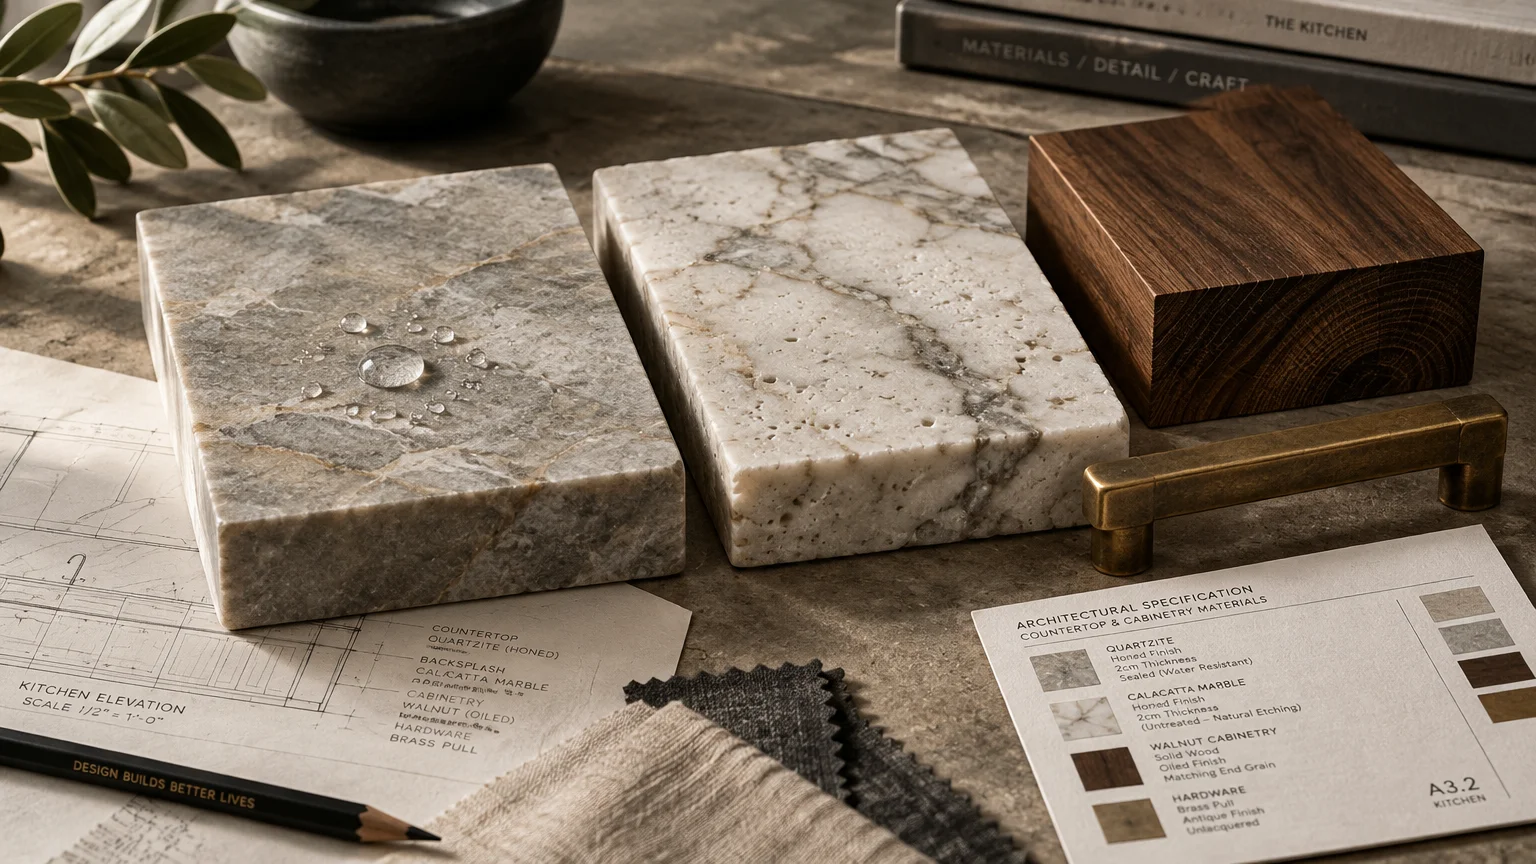
Trend #7: Choosing Superficial Aesthetics Over Material Provenance
The pursuit of picture-perfect trends often tempts homeowners into specifying impractical countertop materials. Installing fragile, high-porosity marble without understanding its maintenance needs leads to rapid disappointment.
Acidic spills from citrus, vinegar, and wine quickly etch untreated natural calcite surfaces. If you crave pristine surfaces, living with irreversible kitchen stains will erode your peace of mind.
Embrace quiet luxury by selecting materials celebrated for their authenticity, durability, and honest provenance. Honed quartzites offer the dramatic veining of exotic marble paired with exceptional structural hardness.
Sintered stone and large-format porcelain slabs present another resilient alternative for busy households. These non-porous surfaces resist extreme thermal shock, deep scratches, and stubborn chemical stains effortlessly.
Carefully evaluate edge profile details to prevent premature chipping along high-traffic perimeters. Micro-beveled or eased edges withstand impacts from barstool hardware far better than sharp, square-mitered corners.
If you specify waterfall edge details, demand precise bookmatching from your stone fabricator. Misaligned veining between horizontal decks and vertical drops shatters the illusion of a monolithic stone block.
Balance cold stone expanses with rich, tactile millwork beneath the counter perimeter. Fluted white oak, wire-brushed walnut, or rich limewash introduce warmth and organic modernism to your space.
Ensure cabinet bases feature robust, water-resistant protective finishes along floor perimeters. High-grade conversion varnishes protect natural wood grains from mop water and persistent scuff marks.
Consider how your countertop edges interact with the surrounding architectural language. Eased, bullnose, or mitered waterfall edges communicate different levels of formality across open floor plans.
Integrate patinated metals like copper or unlacquered brass that mature gracefully over time. Living finishes tell a personal story, reflecting the everyday life and culinary passions of your household.
Durable materials should gracefully develop character over decades rather than showing premature wear. Choose surfaces that endure daily life while acquiring a dignified, lived-in patina.
Thoughtful material curation ties your kitchen island directly to your home’s broader aesthetic narrative. Invest in lasting substance rather than fleeting visual gimmicks.

The Big Picture: Weaving These Trends into Your Home
Modern kitchen design transcends isolated workstations, serving as an architectural bridge between living and dining environments. Your island must harmonize with the broader decorative narrative of your residence.
Echo the tones of your living room upholstery through tactile barstool fabrics and hand-glazed ceramics. This repetition creates effortless visual cohesion throughout open-concept floor plans.
Ground your island using durable, continuous flooring that flows seamlessly across neighboring living spaces. Wide-plank European oak or large-format limestone tiles visually unite functional culinary zones with comfortable gathering areas.
Acoustic balance plays an essential role in open floor plan comfort. Incorporating upholstered seating, natural wood paneling, and textured drapery absorbs echo generated by stone surfaces and running water.
Integrate custom display niches within the island perimeter to showcase treasured art books and sculptural pottery. Blending utilitarian storage with curated display transforms the kitchen into a true living space.
Resisting fleeting fads protects your home from premature obsolescence. Focus on timeless ergonomic fundamentals, authentic materials, and graceful architectural proportions.
When every detail aligns, your island anchors daily rituals with understated elegance. You create a functional sanctuary that nurtures genuine connection for years to come.
For the latest color forecasts, consult industry leaders like Pantone and paint companies like Benjamin Moore. For professional design standards, refer to the American Society of Interior Designers (ASID).
Disclaimer: This article reflects design trend analysis and predictions. Personal taste and timeless design principles should always guide your decorating choices.
Frequently Asked Questions
How do I know if my kitchen layout is too small for an island?
Evaluate your available perimeter space before committing to a permanent built-in island structure. If maintaining 36 inches of walkway clearance and 42 inches of work aisle space is impossible, your room is too narrow.
In compact rooms, a freestanding prep table or a fixed perimeter peninsula offers superior spatial efficiency. These alternatives provide extra prep room without obstructing daily foot traffic.
You can also consider rolling kitchen carts crafted from butcher block and steel. These movable units provide functional versatility while maintaining flexible circulation whenever you entertain guests.
Can I combine a dining table directly with my kitchen island?
Integrated dining extensions represent a sophisticated design trend for contemporary open-concept homes. Lowering the seating section to a 30-inch table height creates a comfortable, welcoming dining experience.
Ensure you maintain at least 18 inches of clear knee depth beneath table-height surfaces. This configuration separates messy food preparation zones from your dining guests while preserving seamless social interaction.
Specifying contrasting materials, such as warm walnut for the dining table against cool quartzite for the prep island, delineates functional shifts beautifully.
What is the most discreet way to install island electrical outlets?
Pop-up receptacles mounted flush with your countertop surface deliver power while meeting modern building codes. Many luxury manufacturers offer custom stone cover plates that match your exact countertop veining.
You can also incorporate shallow vertical risers or integrated backsplashes along the back edge of prep areas. Placing outlets up to 20 inches above the counter conceals cords while satisfying safety requirements.
Alternatively, installing certified charging drawers inside island cabinetry keeps handheld technology organized and completely hidden from view.
How do I prevent my kitchen island from feeling too sterile?
Introduce tactile warmth through textured cabinet paneling, rich timber accents, and artisan lighting fixtures. Fluted wood bases, unlacquered brass hardware, and plaster pendant lights soften cold expanses of stone.
Incorporate personal touches like vintage cutting boards, handmade ceramic vessels, and linen upholstery on barstools. These layered elements infuse your kitchen with soul, provenance, and inviting sophistication.
Displaying live botanicals or organic branch clippings introduces biophilic vibrancy that enlivens stone surfaces effortlessly throughout the seasons.