A slow draining sink disrupts your daily rhythm and diminishes the refined atmosphere of your home. You can restore rapid flow and unclog sink fixtures swiftly with straightforward, non-invasive techniques.
Mineral scale, cosmetic oils, and stray fibers inevitably collect along inner pipe walls over time. When water pools around your custom faucets, immediate action prevents structural damage and unpleasant odors.
These curated DIY plumbing strategies deliver reliable results while protecting your architectural hardware. Implement these practical drain cleaning tips to keep your kitchen and bathroom running effortlessly.
Trend #1: Boiling Water and Thermal Shock Dissolution
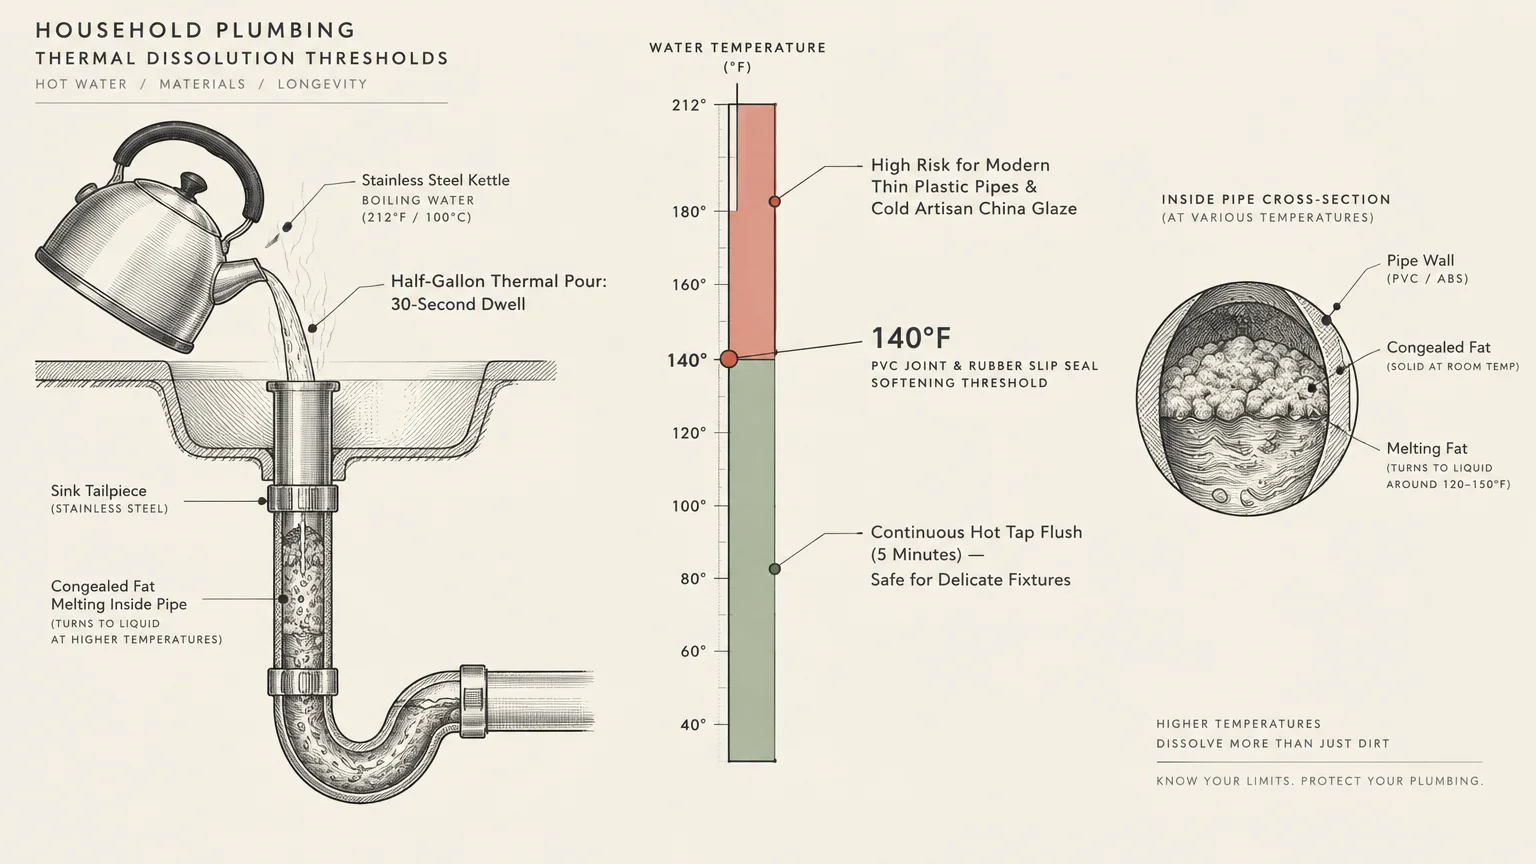
Thermal dissolution represents the purest minimalist approach to clearing slow drain pipes. By pouring near-boiling water into the opening, you melt coagulated fats without harsh synthetic chemicals.
This method works best for kitchen basins and powder rooms suffering from light organic buildup. High thermal energy rapidly softens hardened oils, allowing gravity to carry them away.
Begin by heating one half-gallon of filtered water in a stainless steel kettle until it reaches a rolling boil. Carefully carry the kettle to your sink to avoid splashing adjacent stone countertops.
Position the kettle spout directly above the drain opening to concentrate the flow. Pour half the boiling water slowly into the pipe in a steady, controlled stream.
Pause for thirty seconds to allow the hot water to saturate the core of the blockage. This dwell time softens congealed soap scum clinging to the interior pipe walls.
Pour the remaining boiling water down the drain to flush the softened obstruction toward the sewer main. Listen closely for a healthy gurgling sound that signals clearing pipes.
Exercise caution if your bathroom vanity features modern PVC piping underneath. Water exceeding one hundred forty degrees Fahrenheit can soften thin plastic joints and weaken rubber slip seals.
Never pour boiling water into ice-cold porcelain or artisan vitreous china basins. Rapid temperature fluctuations trigger thermal shock, which can cause microscopic fractures across custom glaze finishes.
If you have delicate ceramic or plastic pipes, use hot tap water flushed continuously for five minutes instead. This gentler thermal treatment protects delicate fixtures while still dislodging superficial residue.
Thermal flushing is an essential baseline step in DIY plumbing maintenance. Perform this quick flush bi-weekly to prevent grease from hardening into impassable obstructions.
Trend #2: Baking Soda and Vinegar Natural Aeration
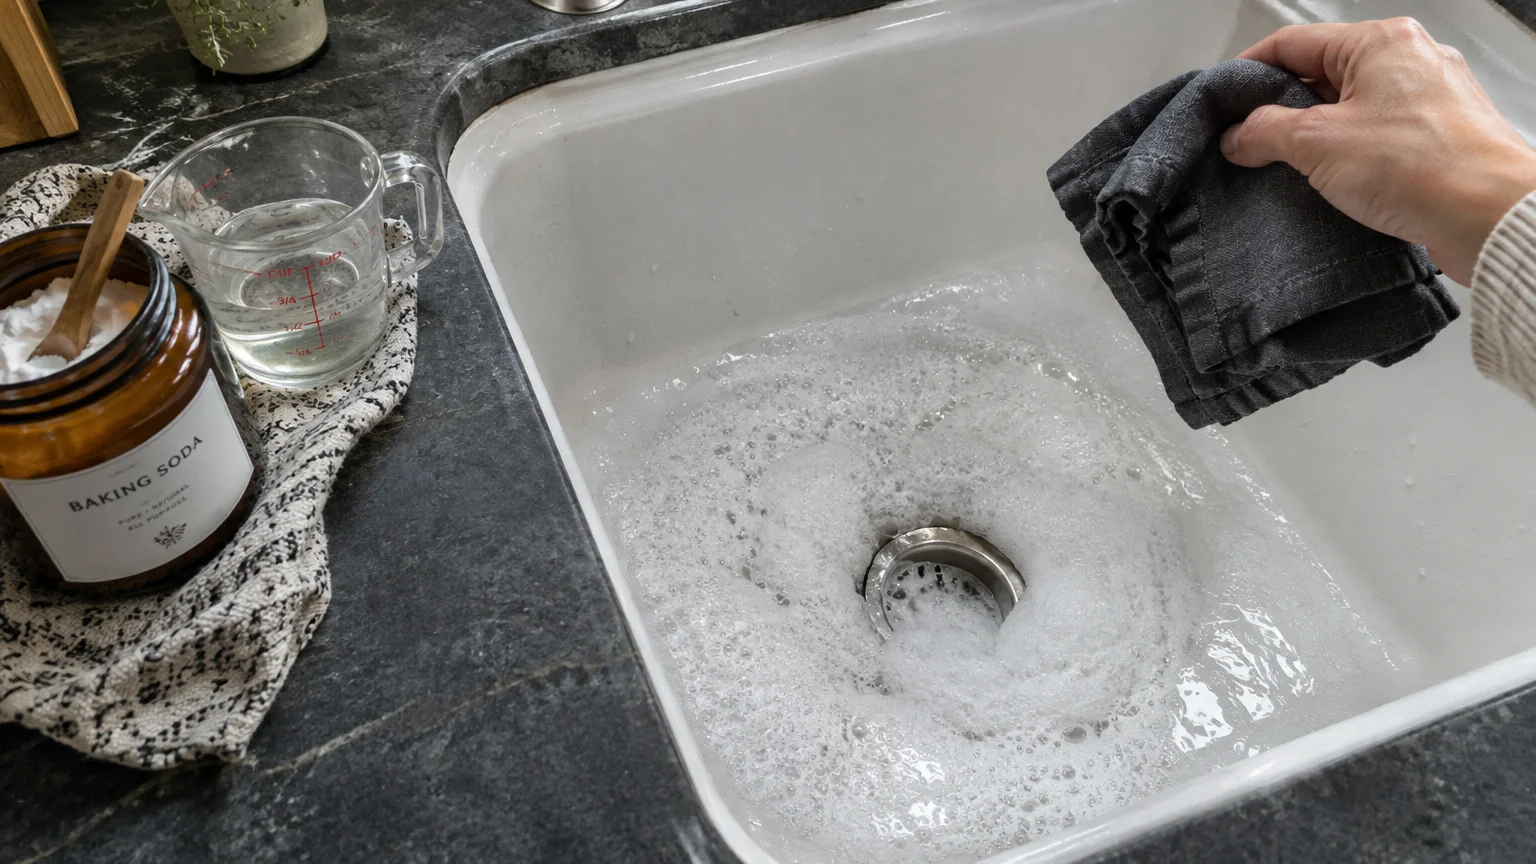
Natural effervescence combines simple chemistry with gentle pipe care to fix slow drain issues safely. Combining sodium bicarbonate with distilled white vinegar generates active carbon dioxide gas that loosens stubborn sludge.
This eco-conscious technique appeals to homeowners who prioritize non-toxic cleaning methods in their living spaces. The expanding foam travels through the pipe cavity, lifting residue from the interior perimeter.
Start by removing any standing water from the basin with a small cup or sponge. Pour one half-cup of dry baking soda directly into the slow draining sink opening.
Use a wooden skewer or funnel to guide the dry powder past the metal strainer basket. Ensure the compound settles deep into the vertical tailpiece of the plumbing.
Pour one half-cup of distilled white vinegar directly over the powder. The ingredients will react instantly, creating a vigorous fizzing foam inside the neck of the pipe.
Cover the drain opening tightly with a damp washcloth or rubber stopper immediately. Trapping the reaction forces the expanding carbon dioxide downward through the clog rather than escaping upward.
Allow the effervescent mixture to work undisturbed for twenty minutes. During this period, the mild acetic acid dissolves mineral scale while the foaming bubbles fracture greasy sediment.
Flush the drain line thoroughly with two quarts of very hot tap water. The running stream carries away the loosened particulate matter, leaving clean pipe walls and a fresh, neutralized scent.
Unlike commercial caustic lye, this mild treatment will not pit unlacquered brass, matte bronze, or polished nickel finishes. It protects the investment you made in your designer plumbing hardware.
Incorporate this aerating fizz into your monthly bathroom cleaning calendar. Regular applications prevent organic debris from solidifying into dense obstructions that require mechanical intervention.
Trend #3: Mechanical Pop-Up Stopper Cleaning
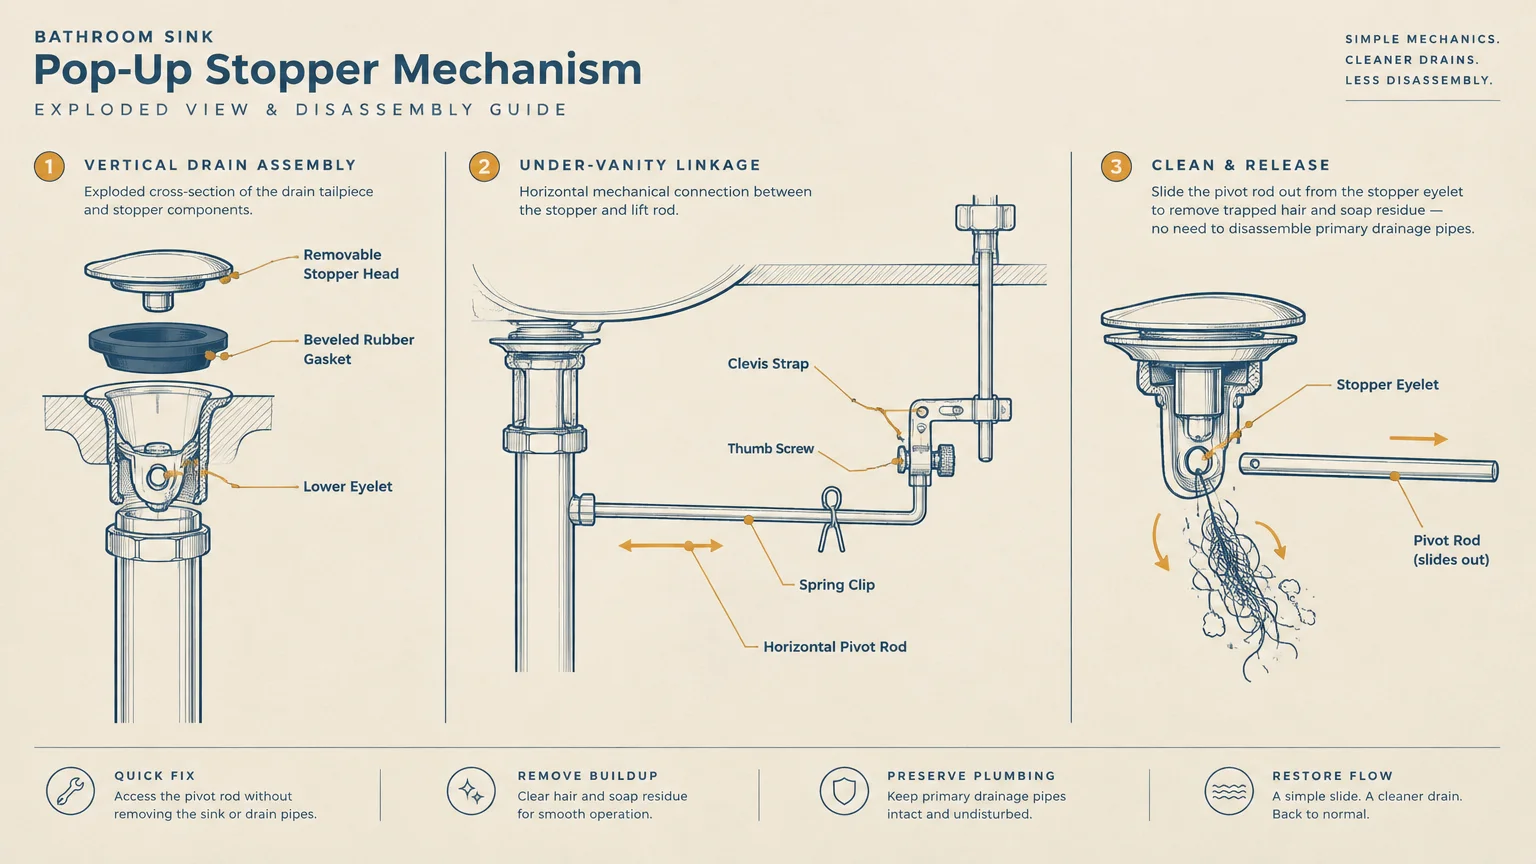
Designer bathroom vanities often feature integrated pop-up stoppers that act as debris traps beneath the drain surface. Over several months, hair, shaving lather, and toothpaste accumulate around the lower stopper assembly.
This mechanical buildup slows passing water and creates an unsightly puddle in your basin. Clearing the stopper itself often resolves your drainage issues without touching the broader plumbing line.
Inspect the underside of your sink where the horizontal pivot rod enters the vertical tailpiece. You will find a knurled metal or plastic retaining nut holding the rod in place.
Loosen this retaining nut by turning it counterclockwise by hand. If the nut is stiff, grip it gently with adjustable pliers padded with a rag.
Slide the pivot rod backward out of the pipe to disengage its internal ball from the stopper eyelet. You can now lift the entire pop-up stopper directly out from above the sink.
Use gloved hands or a paper towel to strip accumulated hair and black biofilm from the stem. Wash the component thoroughly with warm water, gentle soap, and an old nylon brush.
Inspect the small rubber gasket around the stopper head for signs of drying or tearing. Replace worn gaskets promptly to ensure your sink holds water reliably when closed.
Reinsert the clean stopper into the drain hole, aligning the bottom loop toward the pivot rod opening. Slide the pivot rod back inside until it hooks the eyelet securely.
Tighten the retaining nut firmly by hand to avoid cracking the underlying plastic or brass threads. Turn the basin faucet on to verify that water drains rapidly around the stopper.
Test the drain pull rod behind your faucet to confirm smooth, unrestricted upward and downward travel. This quick mechanical adjustment restores flawless function to your architectural fixtures.
Trend #4: The Dedicated Sink Plunger Dynamic Seal
Plunging remains one of the most effective mechanical solutions when you need to unclog sink drains quickly. The technique relies on concentrated hydraulic pressure waves to dislodge dense obstructions lodged past the stopper.
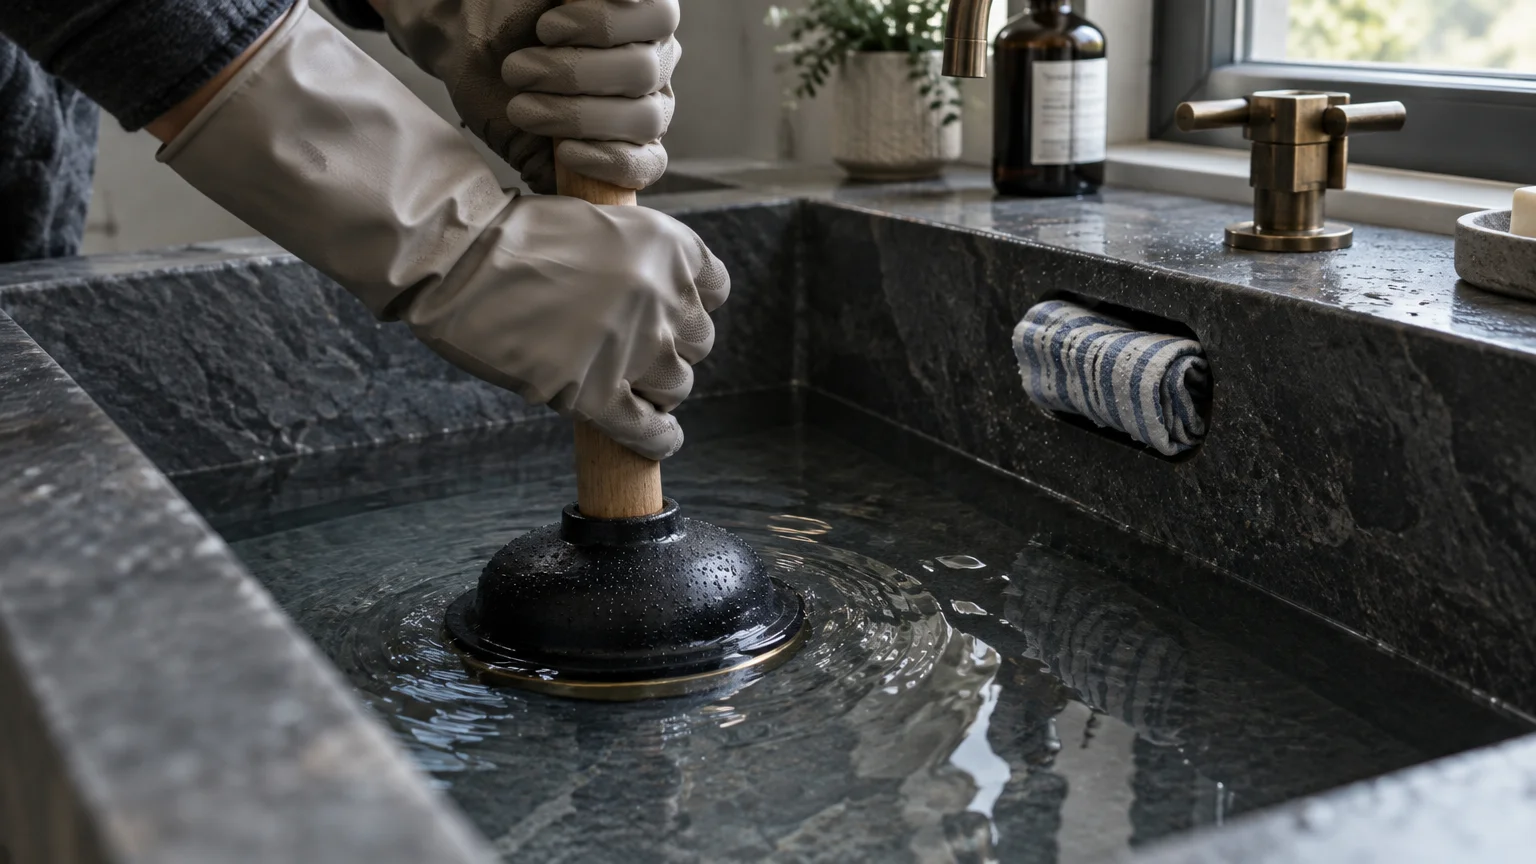
Never use an accordion-style toilet plunger on a delicate bathroom basin. Select a small, flat-rimmed rubber cup plunger designed specifically for flat sink basins.
Before plunging, you must seal the overflow opening located near the upper rim of the sink. An unsealed overflow vent allows air pressure to escape into the room rather than attacking the clog.
Firmly press a damp microfiber washcloth or strip of duct tape over the overflow aperture. This step creates a closed hydraulic system essential for generating maximum suction.
Coat the rubber rim of your plunger with a thin layer of petroleum jelly. This practical technique creates an airtight seal against marble, quartz, or fireclay surfaces.
Run enough warm water into the basin to cover the lower two inches of the rubber cup. Position the cup squarely over the drain opening at a direct ninety-degree angle.
Push down gently to burp out trapped air before initiating the main plunging strokes. Maintain steady contact between the rubber rim and the sink surface throughout the process.
Execute ten to fifteen rapid, rhythmic downward and upward strokes with consistent force. Pull the plunger away sharply on the final stroke to break suction and pull up the blockage.
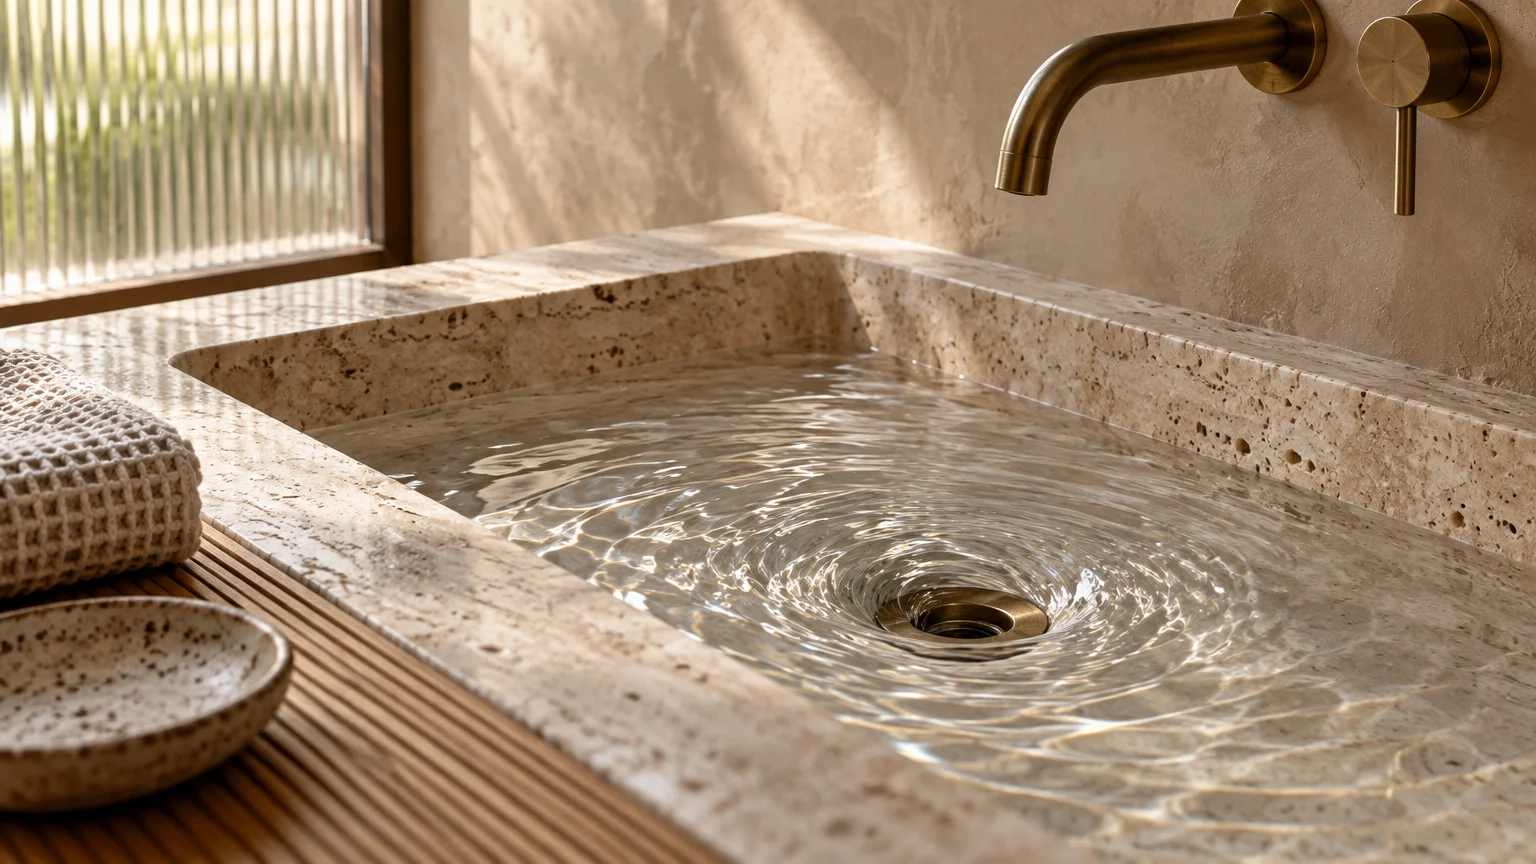
Water should evacuate immediately in a clean, vigorous whirlpool motion. Remove any extracted debris from the basin with paper towels rather than allowing it to wash back down.
Flush the sink with warm water for two minutes to confirm the line is entirely clear. Wipe the basin surface with a microfiber cloth to restore its pristine shine.
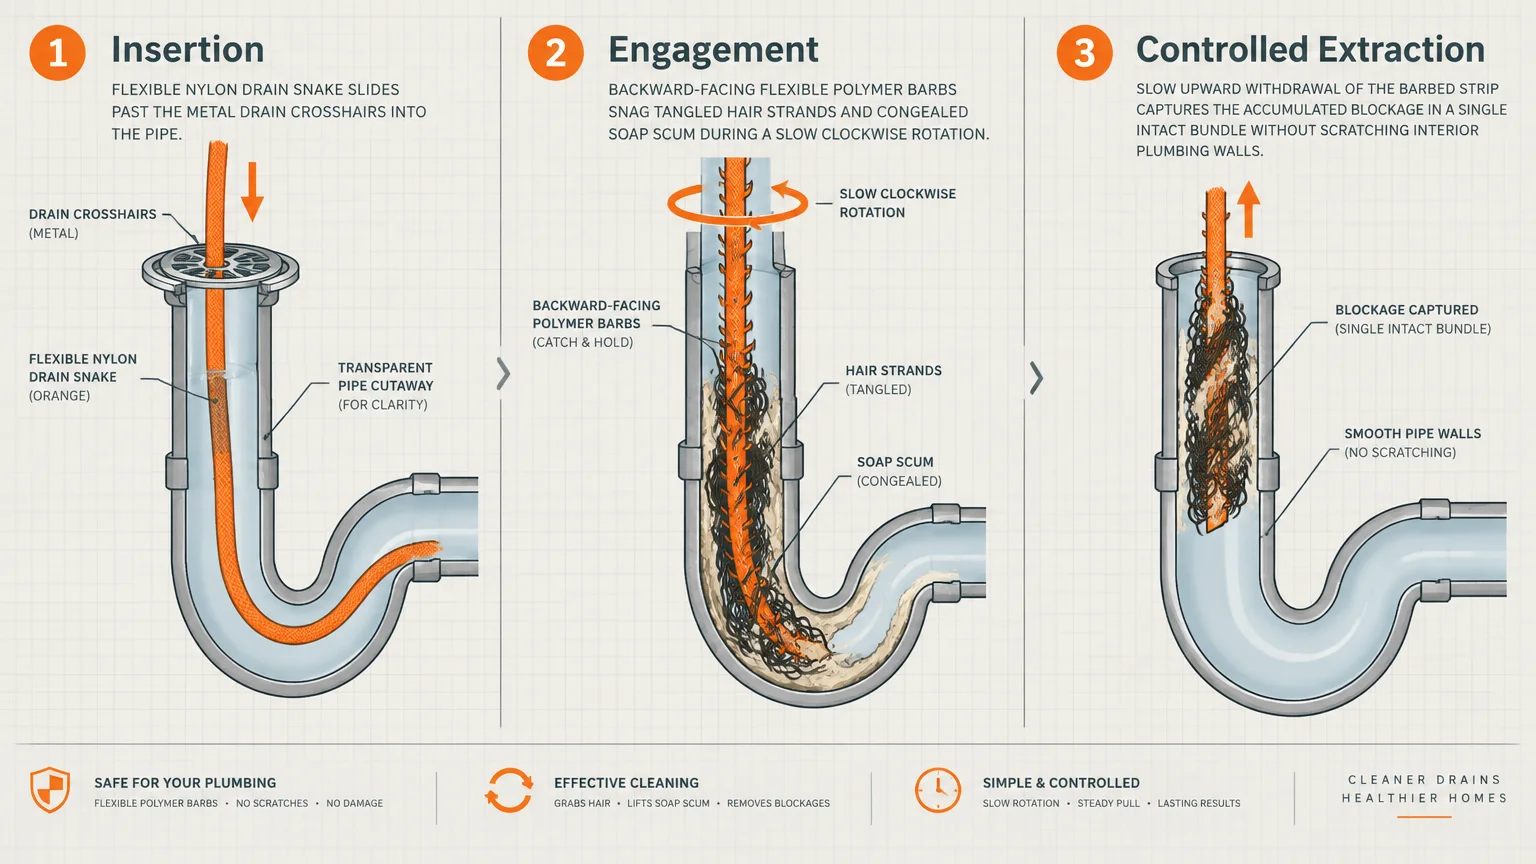
Trend #5: The Barbed Plastic Drain Snake Extraction
Flexible plastic hair snakes provide instant physical extraction for shallow drain obstructions. These slender, barbed wands slide easily past drain grates to retrieve dense hair tangles deep within the pipe.
They cost very little and eliminate the need to dismantle complex vanity cabinetry underneath. This makes them an indispensable tool in your DIY plumbing arsenal.
Clear decorative hand soaps and delicate accessories from your vanity counter before beginning. Insert the barbed tip of the plastic wand straight down into the slow draining sink opening.
Feed the flexible wand down twelve to eighteen inches until you feel firm resistance. Wiggle the handle gently so the directional barbs hook into the fibrous blockage.
Rotate the handle three hundred sixty degrees twice to wind the tangled hair securely around the plastic shaft. Avoid forcing the tool aggressively, which could snap the flexible spine.
Draw the wand upward with a slow, deliberate pulling motion to extract the clog. Keep a small trash bag nearby so you can dispose of the extracted mess immediately.
Repeat this probing motion at slightly different angles around the perimeter of the pipe. Continue extracting until the wand withdraws cleanly without catching any residual matter.
Rinse the drain with warm water from the faucet to sweep away tiny loosened fragments. You will see an immediate improvement in water drainage speed across your basin.
Wash the reusable plastic tool with disinfectant spray, or discard inexpensive single-use versions in your recycling bin. Store the clean tool in your utility closet for fast access.
This quick mechanical method clears the vast majority of bathroom sink clogs in under five minutes. It prevents organic buildup from advancing further into your wall plumbing.
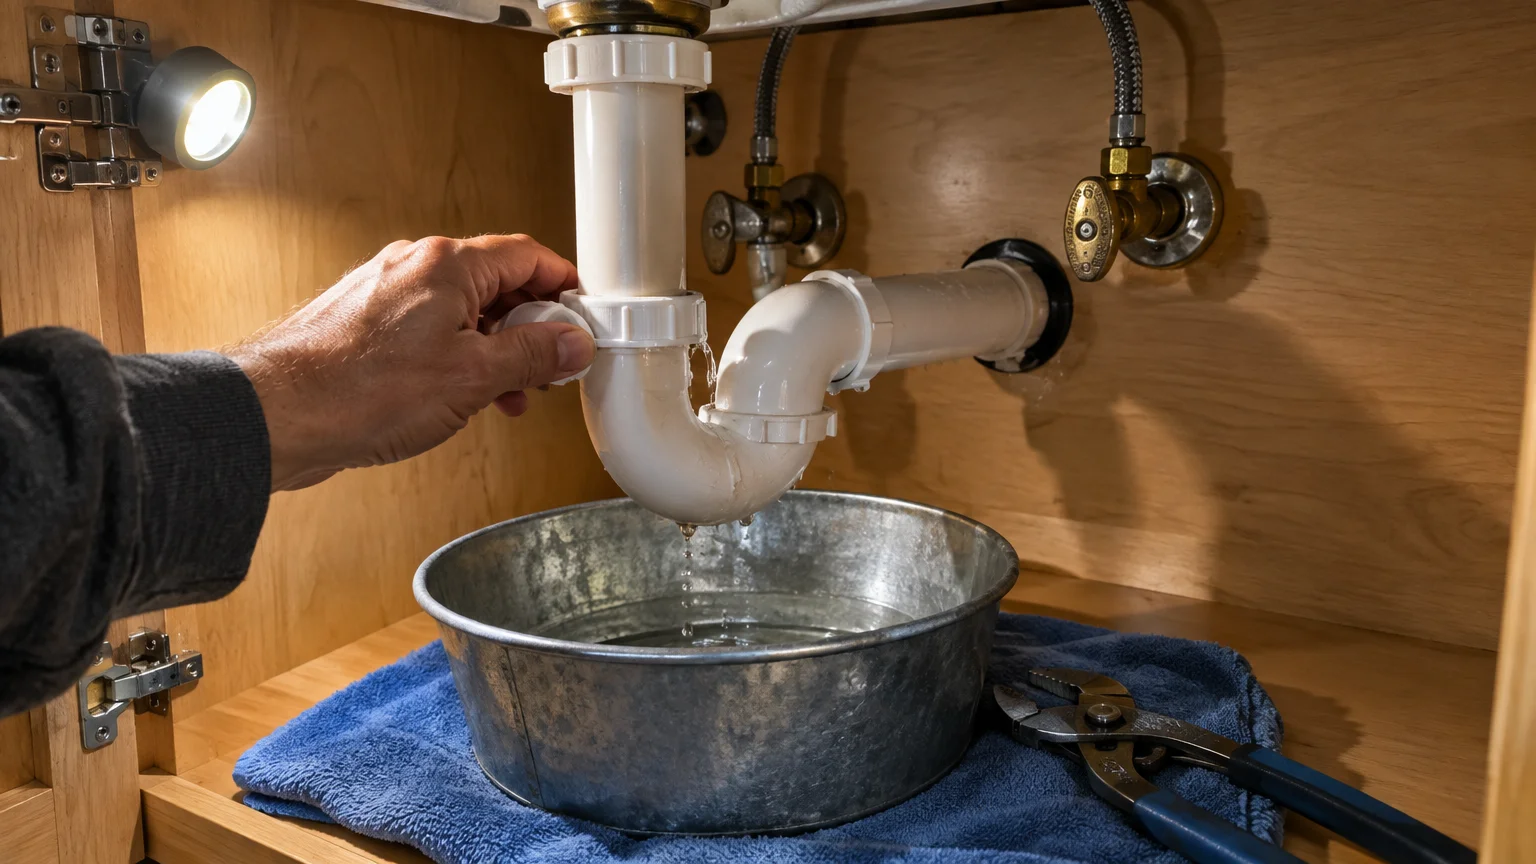
Trend #6: P-Trap Disassembly and Sludge Removal
When surface remedies fail, clearing the curved P-trap beneath your vanity delivers permanent relief. This curved pipe segment traps standing water to block noxious sewer gases from entering your living spaces.
Because of its curved profile, the P-trap also catches heavy sediment, hairpins, and lost jewelry. Disassembling this component allows you to clear the deepest localized obstructions thoroughly.
Remove all luxury toiletries and storage baskets from inside the vanity cabinet. Place a shallow plastic bucket and an old towel directly beneath the curved pipe bend.
Identify the two large threaded slip nuts connecting the curved trap to the vertical tailpiece and the wall pipe. Loosen both nuts by turning them counterclockwise by hand.
If the nuts are stubborn, use slip-joint pliers wrapped in masking tape. The tape protects brushed brass, matte black, or chrome finishes from unsightly tool marks.
Slide the loosened slip nuts away from the joints and gently pull the curved trap downward. Allow stagnant water and trapped sludge to empty directly into your bucket.
Carry the disconnected P-trap to a utility sink or outdoor faucet for thorough sanitization. Scrub the interior curve using a stiff nylon bottle brush and warm soapy water.
Inspect the rubber or polyethylene slip-joint washers seated inside each connection. If the washers appear brittle, warped, or cracked, replace them with fresh matching gaskets immediately.
Reinstall the clean P-trap by aligning it with the vertical tailpiece and the horizontal wall tube. Tighten both slip nuts firmly by hand, followed by a gentle quarter-turn with pliers.
Turn your sink faucet on at full flow to test the connection under dynamic water pressure. Run a dry paper towel over each joint to ensure no hidden moisture leaks past the seals.
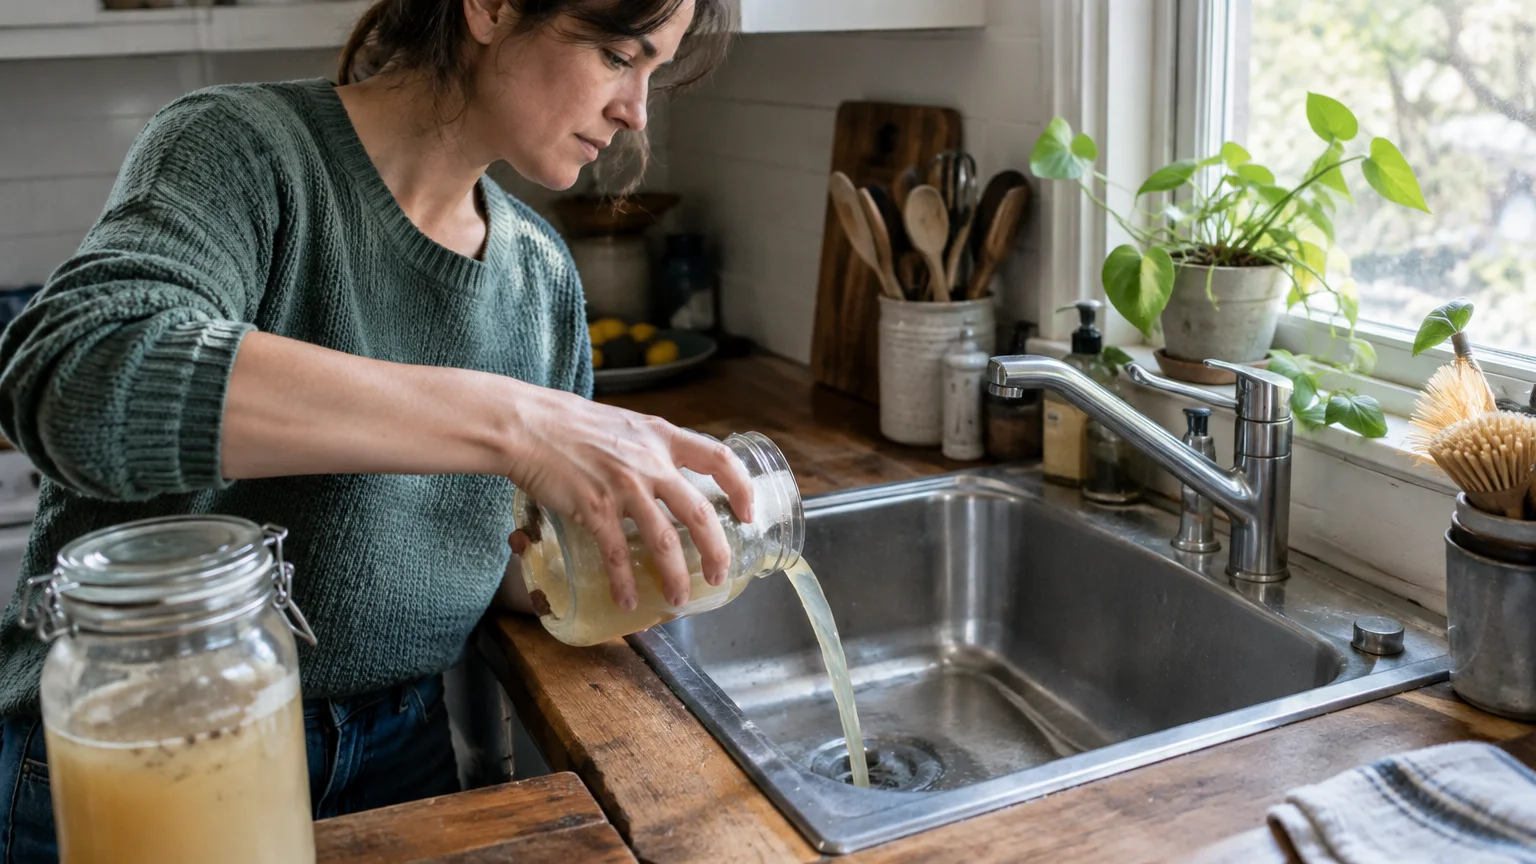
Trend #7: Eco-Enzymatic Biological Drain Cleaners
Modern biophilic home design prioritizes biological balance, and eco-enzymatic drain cleaners reflect that mindful approach. These advanced formulas contain living bacterial cultures that digest organic matter without producing harsh chemical odors.
Unlike caustic drain openers, biological enzymes will not corrode copper piping, unlacquered brass finishes, or rubber seals. They protect your home investment while supporting sustainable environmental practices.
These natural enzymes break down complex proteins, body oils, and soap residues into basic carbon dioxide and water. They establish a beneficial bacterial layer along pipe walls that continuously resists future buildup.
Apply enzymatic treatments at night before retiring to bed. Leaving the fixture undisturbed for six to eight hours provides the microscopic organisms ample time to digest stubborn clogs.
Mix the concentrated biological formula with lukewarm water according to container instructions. Never use hot or boiling water, as extreme heat destroys the living bacterial cultures instantly.
Pour the activated solution directly down the slow draining sink and keep the faucet turned off overnight. Avoid running water in adjacent fixtures that share the same drainage branch.
In the morning, flush the sink with hot tap water for three continuous minutes. The steady stream washes away fully digested residues, leaving your pipes clean and smelling fresh.
Use this eco-friendly biological treatment once a month as routine preventative plumbing maintenance. It keeps your drainage paths running freely without stripping delicate metallic fixture coatings.
Enzymatic cleaners are completely safe for homes with private septic tanks and municipal wastewater systems. They foster an environmentally sound living environment without sacrificing mechanical efficiency.
Adopting this gentle biological method transforms routine plumbing care into an effortless sustainability practice. It keeps your architectural fixtures operating at peak performance year after year.

The Big Picture: Weaving These Trends into Your Home
An elevated interior relies on flawless mechanical function just as much as harmonious colors and textures. A slow draining sink disrupts your daily routines and diminishes the refined serenity of your home.
View plumbing care as an essential aspect of overall architectural preservation rather than an unwelcome chore. Proactive drain cleaning tips prevent emergency pipe failures that could damage custom cabinetry and flooring.
Integrate mechanical hair snaring and natural enzymatic flushes into your seasonal home maintenance routine. Combining physical clearing with biological digestion keeps your drainage lines clear with minimal effort.
Respect the materials within your space by avoiding harsh chemicals that damage artisanal finishes. Gentle DIY plumbing solutions protect unlacquered brass faucets, marble countertops, and delicate vintage ceramic basins.
When your infrastructure functions smoothly behind the scenes, you can fully appreciate the sensory beauty of your living spaces. Thoughtful home care safeguards both aesthetic elegance and everyday comfort.
For the latest color forecasts, consult industry leaders like Pantone and paint companies like Benjamin Moore. For professional design standards, refer to the American Society of Interior Designers (ASID).
Disclaimer: This article reflects design trend analysis and predictions. Personal taste and timeless design principles should always guide your decorating choices.
Frequently Asked Questions
Will boiling water crack my porcelain or ceramic sink basin?
Boiling water can crack vitreous china or porcelain basins through thermal shock if applied improperly. When boiling water strikes an ice-cold sink surface, rapid uneven expansion causes micro-fractures in the glaze.
To protect delicate basins, run hot tap water for thirty seconds to warm the surface before pouring. Alternatively, stick to warm water paired with baking soda and vinegar for safer cleaning.
Can chemical drain cleaners damage luxury faucet finishes?
Caustic chemical cleaners generate intense heat and corrosive fumes that quickly tarnish metallic surfaces. Splashes permanently ruin unlacquered brass, matte black, and oil-rubbed bronze finishes on high-end designer faucets.
These harsh chemicals can also dissolve the rubber O-rings and plastic washers inside your pop-up drain assembly. Stick to mechanical tools or biological enzyme cleaners to protect your hardware warranties.
How often should I clean my bathroom sink pop-up stopper?
Clean your sink pop-up stopper every three months to prevent hair and soap scum from forming dense mats. Regular extraction takes only five minutes and stops blockages before they reach the lower P-trap.
Scheduling this task alongside your seasonal deep cleaning keeps your basins draining freely throughout the year. It also prevents unpleasant bacterial odors from rising out of the drain opening.
When is it necessary to call a licensed plumber instead of DIY plumbing?
Contact a professional plumber if multiple fixtures in your home back up simultaneously. That symptom indicates a blockage deep within your main sewer line rather than an isolated sink issue.
You should also hire a professional if disassembling the P-trap does not resolve the slow draining sink. Stubborn blockages located deep inside wall framing require professional motorized drain snaking equipment.