Lighting defines the emotional resonance and perceived value of your home faster than any architectural finish. When you install fixtures that clash with room volume, even luxurious spaces look unfinished and hollow.
Mastering home lighting design requires an understanding of scale, material provenance, and luminous temperature. Avoiding common ceiling light decor mistakes transforms an ordinary interior into an elevated sanctuary of quiet luxury.
By recognizing these subtle errors, you can upgrade ceiling lights and establish a cohesive aesthetic throughout your living spaces. Here are the seven critical mistakes that undermine ceiling fixtures and the elevated solutions to fix them.
Trend #1: Scale Disproportion — The Undersized Fixture Trap
High-end interiors rely on deliberate architectural scale to establish grounding and visual authority. An undersized flush mount or chandelier instantly signals an afterthought and diminishes surrounding decor.
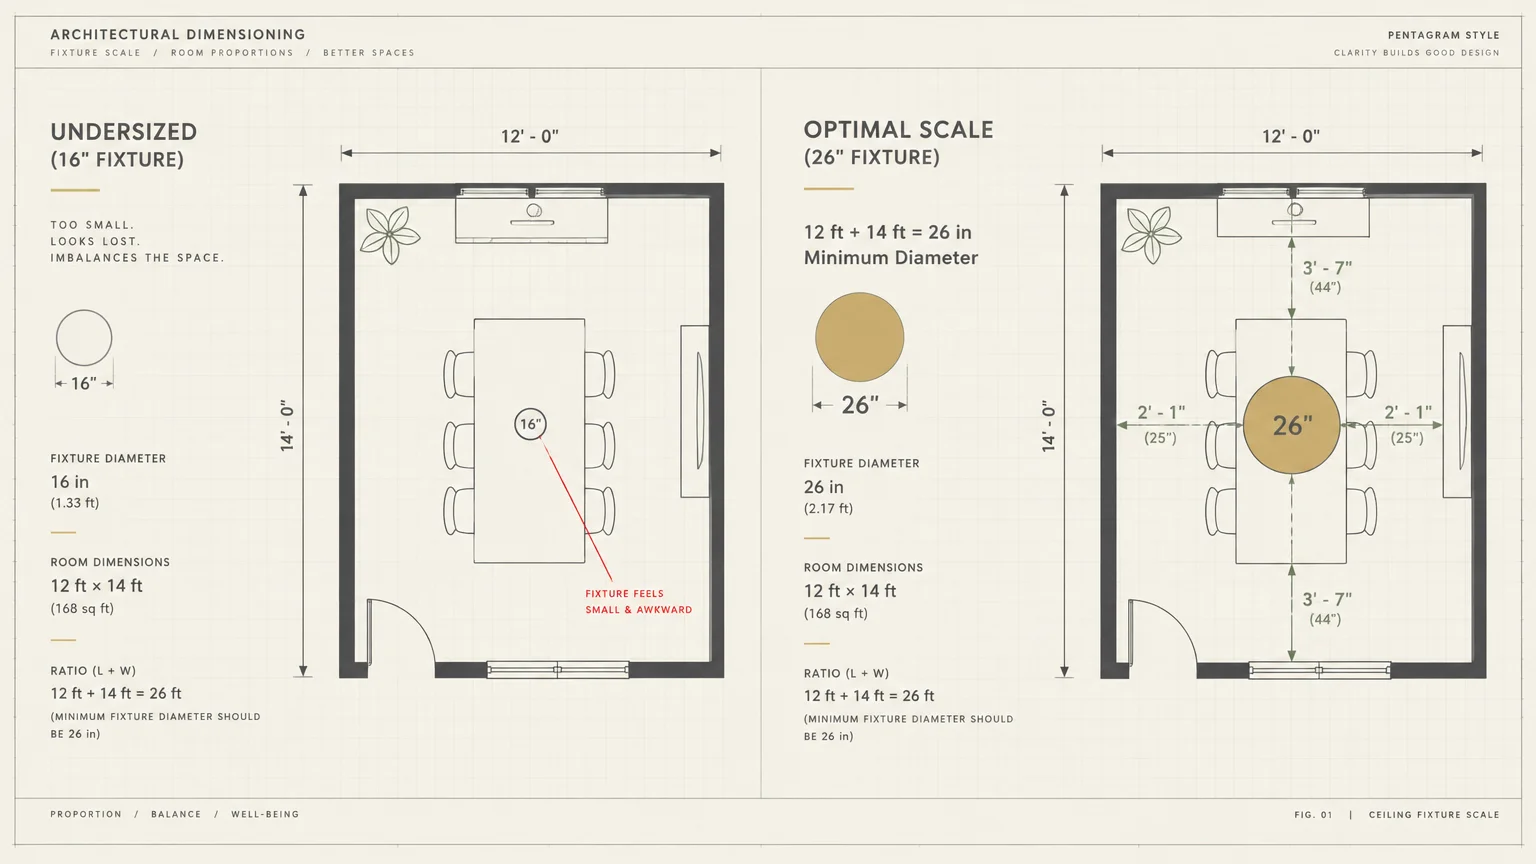
Designers calculate optimal fixture diameter by adding the room’s length and width in feet. That combined number converted into inches establishes the minimum diameter your space requires.
In a twelve-by-fourteen-foot dining space, a dainty sixteen-inch fixture looks lost and fragile. You need an expansive twenty-six-inch fixture to anchor the volume of the room properly.
Tiny dome lights expose ceiling imperfections while failing to establish an intentional focal point. They leave expansive ceilings looking bare, hollow, and devoid of intentional architectural character.
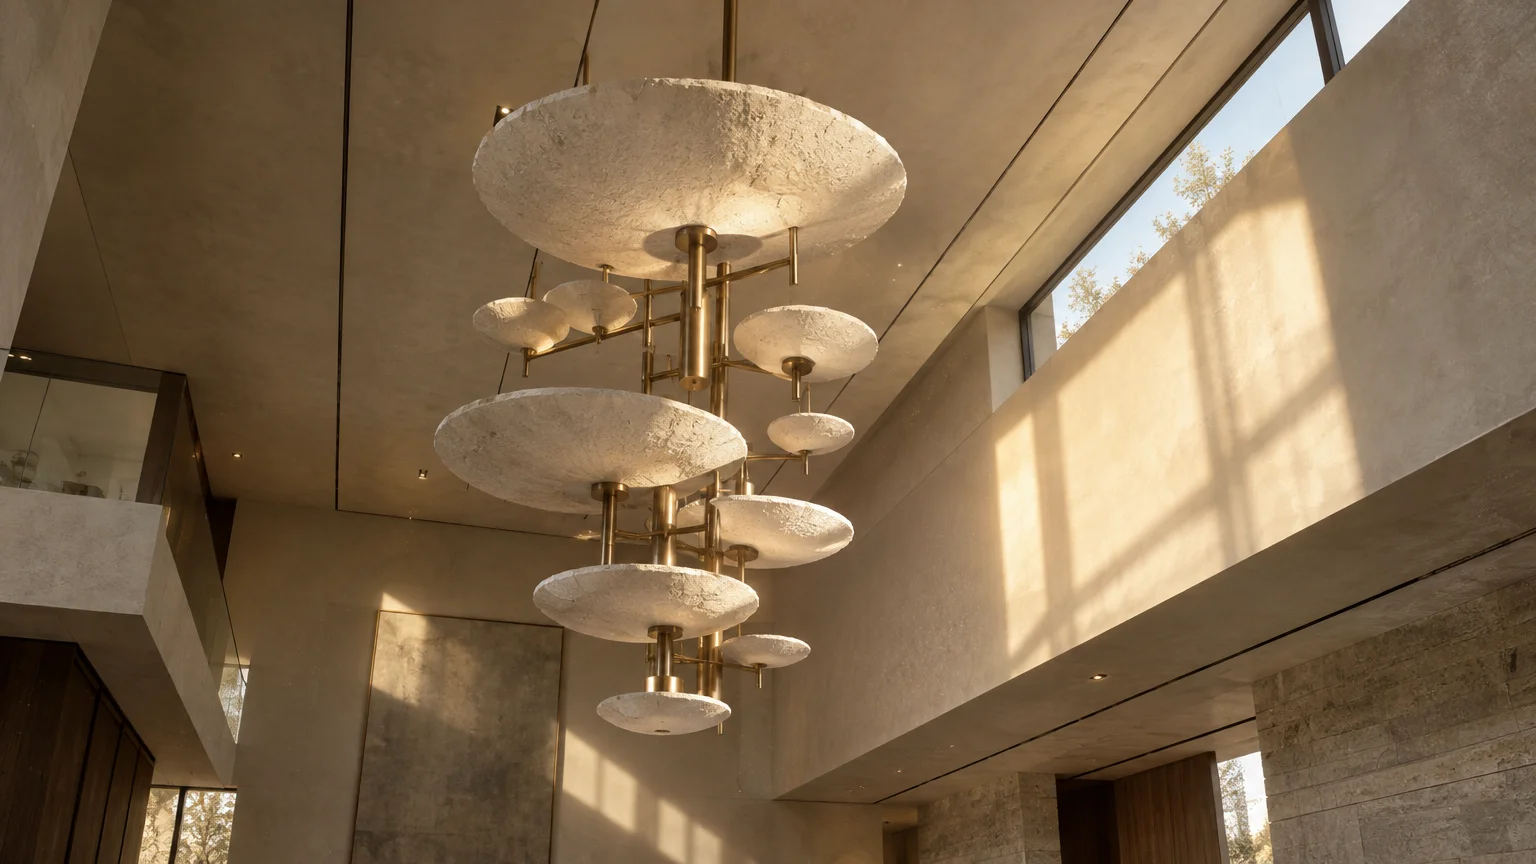
Today’s leading ceiling light ideas embrace generous proportions with sculptural silhouettes. Volumetric pendants made from plaster, spun brass, or woven abaca ground your living spaces with quiet authority.
When selecting lighting for high or vaulted ceilings, prioritize vertical drop and visual presence. Choose fixtures that occupy the vertical void rather than shrinking into the rafters.
Expanding your fixture dimensions shifts the atmosphere from utilitarian builder-grade minimalism to bespoke grandeur. Generous scale delivers immediate perceived value to your entire room layout.
A fixture should command space without suffocating sightlines or overwhelming nearby wall art. Strike this delicate equilibrium by choosing airy armatures or open-cage silhouettes for larger footprints.
In long corridors and galley kitchens, replace a sequence of small flush mounts with elongated linear pendants. Linear profiles lengthen visual perspectives and create continuous, unbroken lines of illumination.
Correcting scale issues immediately resolves the visual awkwardness that plagues so many standard renovations. When proportions align with architectural volume, your lighting commands respect effortlessly.
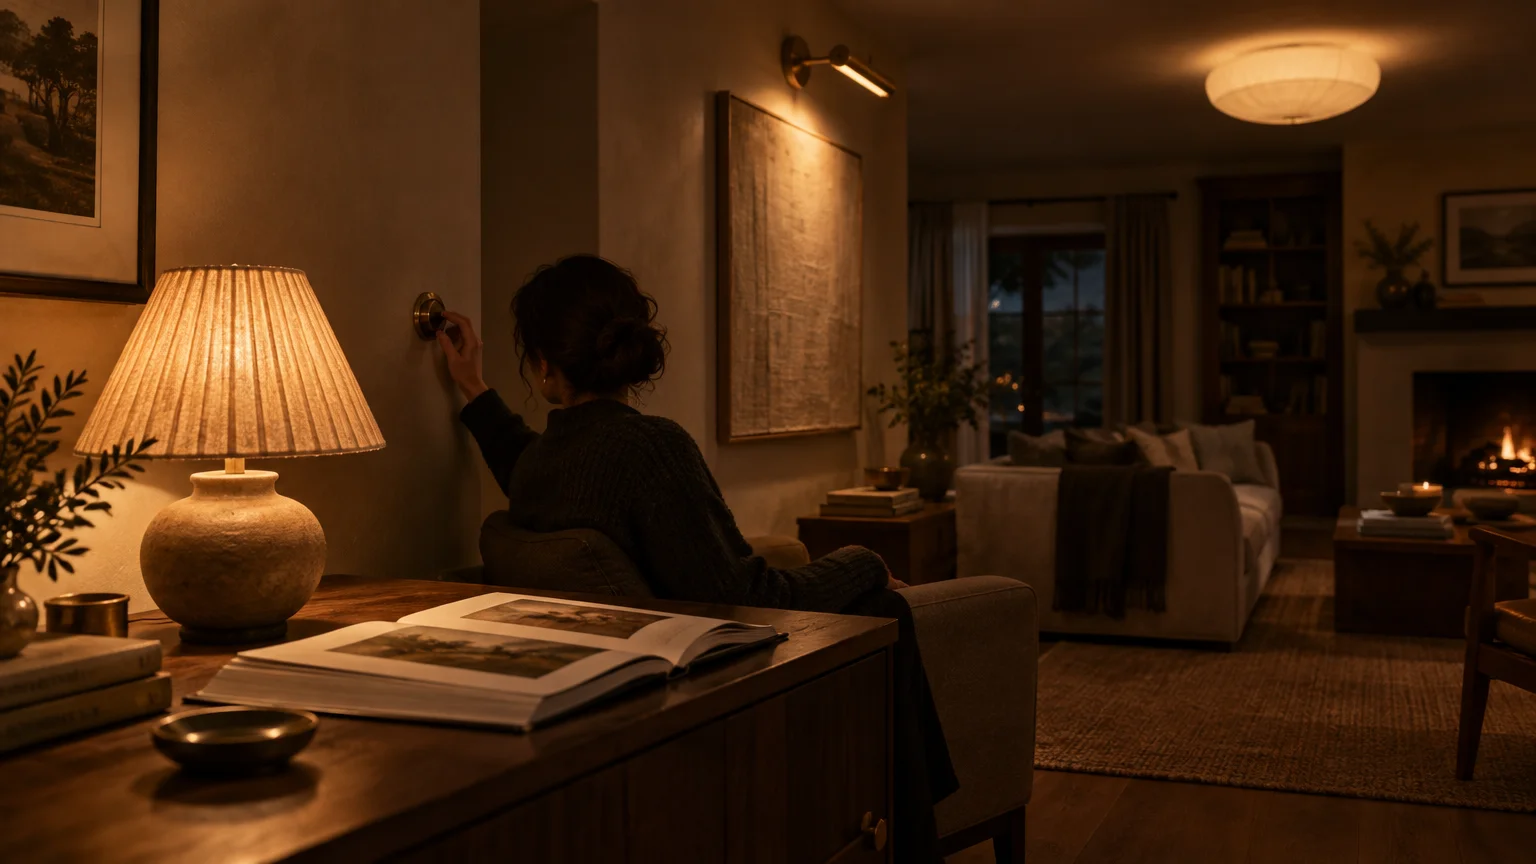
Trend #2: The Solitary Light Source — Neglecting Layered Illumination
Relying exclusively on a single central ceiling fixture creates a flat, clinical environment. This approach casts unflattering downward shadows and drains warmth from your curated surfaces.
Sophisticated home lighting design balances ambient ceiling fixtures with task and accent layers. A single overhead beam cannot fulfill the diverse functional demands of a modern interior.
When you flood a room from one central point, you eliminate depth and dynamic contrast. Architectural features, fine upholstery, and textured rugs lose their tactile nuance under uniform overhead glare.
Contemporary lighting tips emphasize the timeless rule of triad illumination. Pair a sculptural flush mount with low-level table lamps, directional sconces, and discreet floor uplighting.
Integrating dimmers across every ceiling circuit provides instantaneous control over mood and intensity. Without dimmer modules, your ceiling illumination remains rigid, aggressive, and devoid of intimacy.
Position secondary light sources at eye level to soften the ambient glow cast from above. This layered composition creates a welcoming atmosphere reminiscent of a boutique hotel lounge.
By treating overhead fixtures as one component of a broader lighting tapestry, your home achieves spatial depth. Layered illumination softens sharp perimeters and invites effortless relaxation.
Smart automation controls allow you to program customized lighting scenes for different hours of the day. A daytime setting might highlight ceiling fixtures, while an evening scene favors soft sconce illumination.
Accent lighting also directs the eye toward treasured focal points, such as curated bookcases or oil paintings. Overhead ambient fixtures can then operate at low output, providing a subtle, flattering envelope of light.
Escaping the single-fixture trap creates a multidimensional retreat full of atmosphere and visual rhythm. Your interior immediately feels more luxurious when light emanates from diverse elevations.
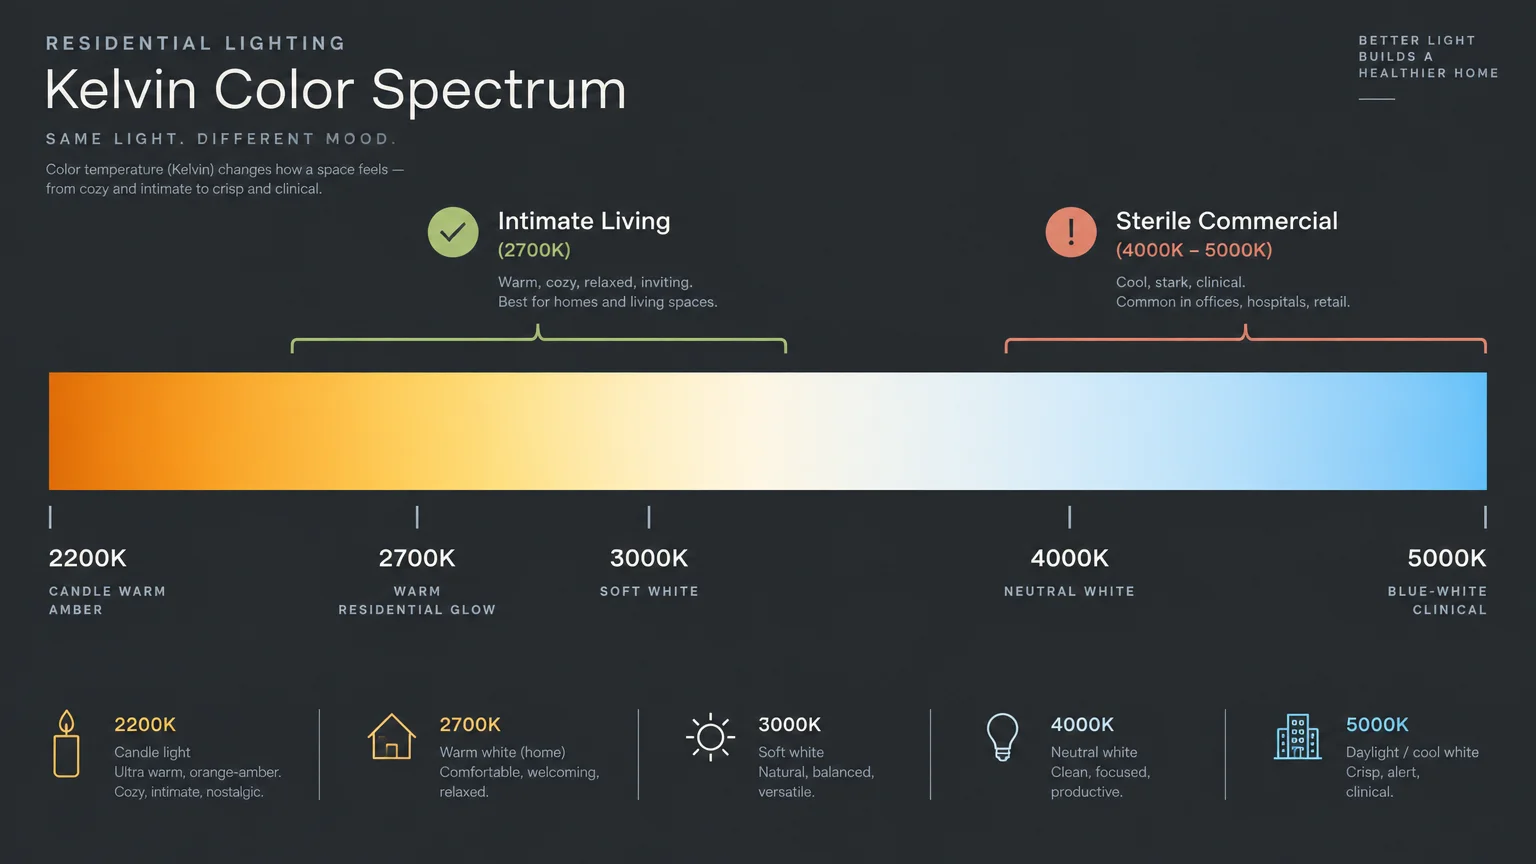
Trend #3: Harsh Color Temperature — Overlooking Kelvin Nuance
Bulb temperature dictates emotional warmth and surface tonality throughout your home. Installing cool white bulbs above 3000 Kelvin turns warm living rooms into sterile, commercial showrooms.
High-Kelvin bulbs distort paint pigments, making rich neutral tones appear muddy and unappealing. They also emphasize dust, drywall seams, and slight surface irregularities across flat ceilings.
To cultivate warmth, specify bulbs rated between 2400K and 2700K for living and dining spaces. This spectrum emits an amber, candlelit radiance that honors rich hardwoods and soft textiles.
Reserve 3000K illumination exclusively for task-driven spaces like utility sculleries and modern culinary kitchens. Even in work areas, never exceed 3500K if you value domestic tranquility.
Color Rendering Index, or CRI, serves as an equally crucial metric for fixture elegance. Bulbs with a CRI rating below 90 wash out vibrant fabrics and dull natural timber grains.
Always select high-CRI LED sources that render color accurately while consuming minimal wattage. High-fidelity illumination enriches wall coatings and reveals the authentic undertones of your furnishings.
Calibrating your Kelvin levels instantly elevates builder-basic ceiling fixtures into sources of flattering, golden-hour light. It remains one of the simplest, most transformative upgrades available.
Dim-to-warm LED technology mimics incandescent bulbs by shifting toward warmer hues as you reduce intensity. This subtle chromatic evolution creates an inviting, fireside glow during twilight hours.
Mismatched bulb temperatures within a single room create jarring chromatic friction. Ensure that every recessed can, pendant, and table lamp in a zone shares the exact same Kelvin specification.
Mastering Kelvin precision gives your home a polished, cohesive atmosphere from day into night. Harmonious color temperatures ensure that every decorative finish displays its true brilliance.
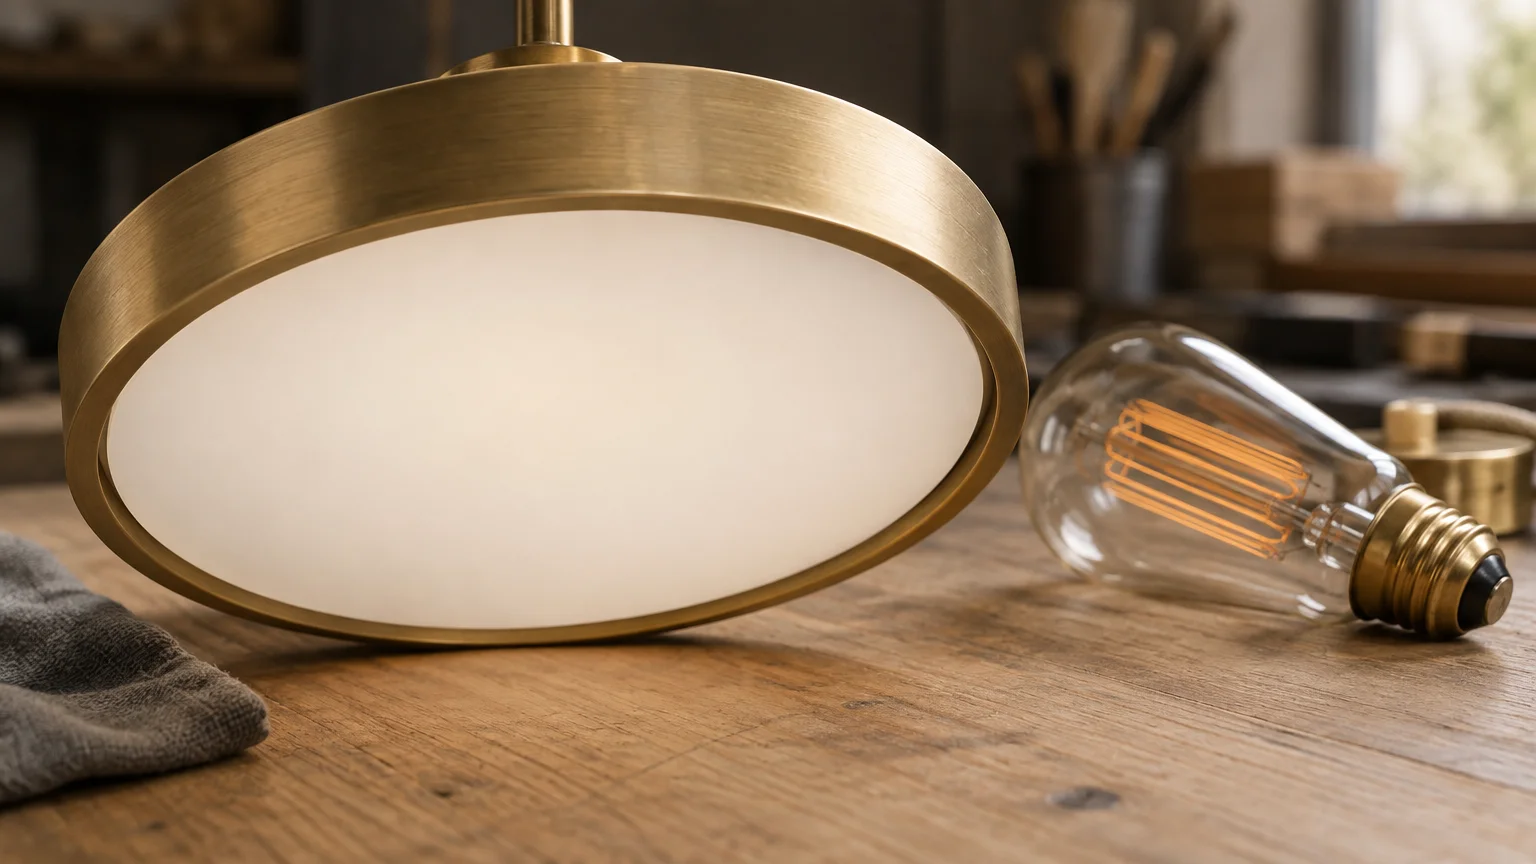
Trend #4: Exposed Utility Bulbs — Forgetting Diffusers and Glare Guards
Nothing degrades high-end lighting design faster than bare, unshielded bulbs blinding guests at eye level. Direct filament glare induces visual fatigue and disrupts an otherwise serene design aesthetic.
Budget lighting often cuts production costs by omitting frosted lenses and tailored linen diffusers. The resulting piercing light washes out surrounding decorative elements and creates visual discomfort.
When purchasing modern chandeliers or flush mounts, seek models featuring milk-glass globes or discreet baffling. Frosted materials scatter illumination gently across the ceiling plane and adjacent walls.
If your existing fixture showcases exposed sockets, replace standard bulbs with dipped metallic crown bulbs. These mirrored globes bounce light backward into the canopy, eliminating forward visual glare entirely.
Alternatively, install fabric drum shades lined with diffusing acrylic discs along their bottom rim. This tailoring shields the bulb mechanism while dispersing a soothing, ambient glow across your seating area.
Hidden illumination represents a foundational pillar of biophilic and wellness-oriented interior design. Soft, diffused fixtures protect circadian rhythms and nurture an atmosphere of tranquil luxury.
Eliminating bare bulb glare instantly transforms an aggressive lighting element into a soothing work of art. Your eyes relax, allowing you to appreciate the room’s overarching decor.
Deep-set baffle trims for recessed downlights also hide light sources from standard oblique angles. This architectural detail conceals the light engine, ensuring illumination seems to emanate naturally from the ceiling.
Pleated silk, natural parchment, and fluted glass shades offer timeless alternatives to raw industrial hardware. These tactile materials soften luminous output while introducing bespoke texture overhead.
Shielding the direct light source elevates comfort and ennobles the visual character of your home. A gentle, diffused glow always signals refined luxury and careful spatial planning.

Trend #5: Flat Finishes — The Absence of Material Provenance
Mass-produced lighting fixtures often rely on fake brushed nickel coatings and synthetic spray-painted brass. These hollow, artificial surfaces peel over time and look noticeably cheap under direct light.
Elevating your lighting requires fixtures celebrated for authentic material provenance and tactile craftsmanship. Authentic unlacquered brass, blackened steel, mouth-blown glass, and hand-formed ceramics age with extraordinary grace.
Living finishes evolve alongside your home, developing a rich patina that signals enduring heritage. This dynamic characteristic separates bespoke, heirloom fixtures from disposable retail commodities.
Contrast also matters when pairing fixtures with your ceiling color and decorative molding. A polished chrome pendant against a stark white ceiling can feel antiseptic and visually jarring.
Contrast matte ceramic or antique bronze fixtures against warm plaster ceilings for timeless depth. The interplay between rich physical texture and ambient light creates captivating architectural interest.
Inspect canopy plates and mounting screws before committing to any new ceiling installation. Solid metal hardware and invisible fastening mechanisms indicate superior build quality and discerning taste.
Investing in genuine material integrity ensures your ceiling lights anchor the room with effortless sophistication. Quality materials always reveal their superior provenance upon closer inspection.
Organic textures such as hand-hammered metals, alabaster, and hand-turned timber celebrate artisan craftsmanship. Incorporating these tactile elements introduces artisanal soul into clean, minimalist interiors.
Avoid shiny plastic fittings or faux wood grain painted over hollow sheet metal. Discerning homeowners instantly spot synthetic shortcuts, which undercut the elegance of surrounding furnishings.
Choosing authentic materiality guarantees your lighting endures both physical wear and evolving stylistic fads. True craftsmanship provides enduring aesthetic credibility that elevates the entire room.
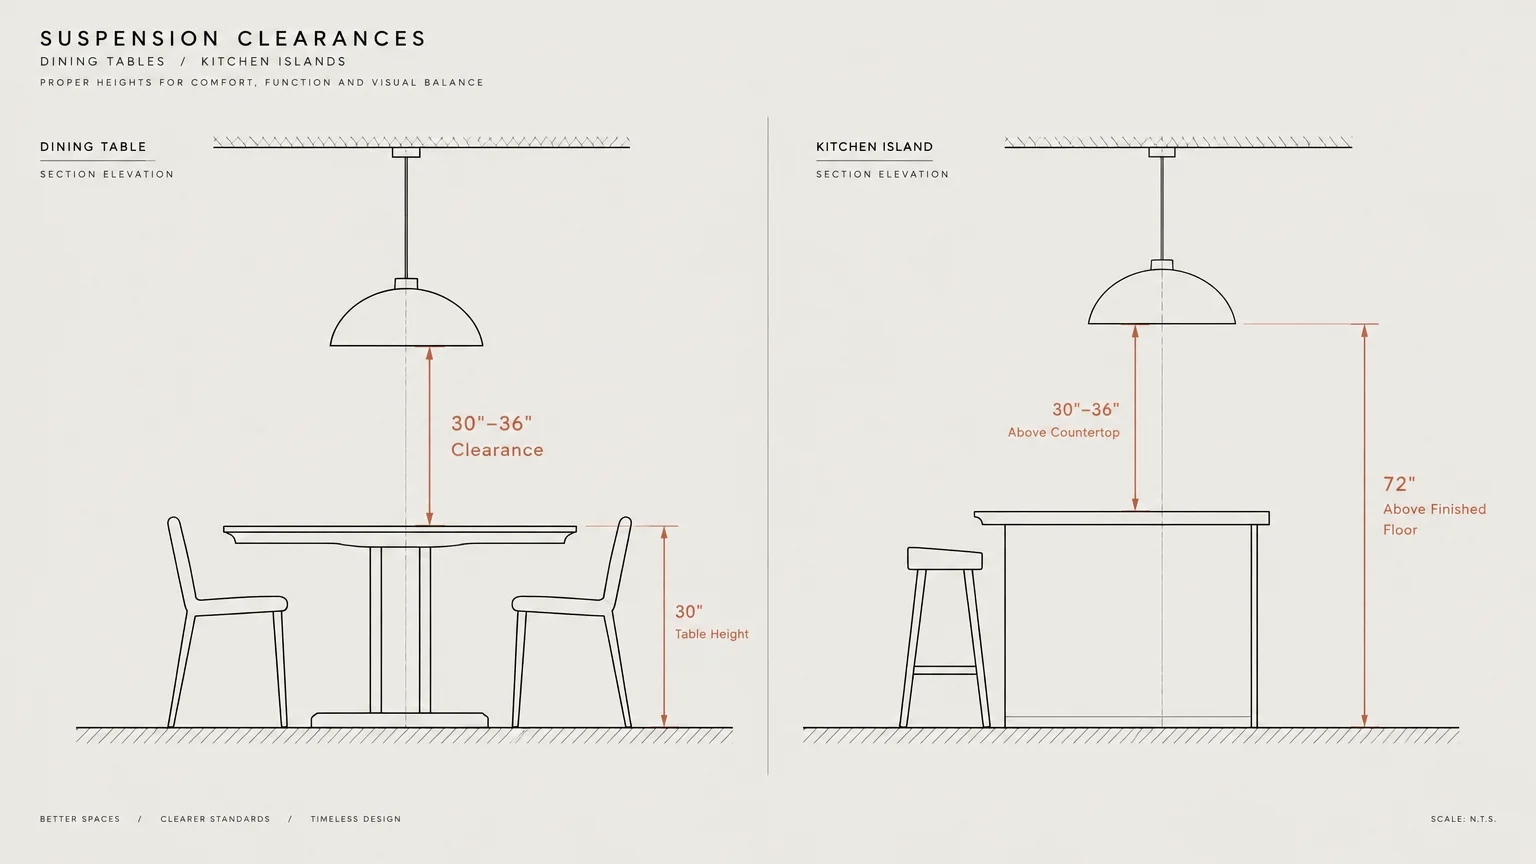
Trend #6: Suspended Height Errors — The Floating Pendant Syndrome
Hanging ceiling pendants too high or too low disturbs room proportions and balance. Pendants suspended too close to the ceiling look timid, while low fixtures obstruct sightlines.
Above a dining table, maintain thirty to thirty-six inches between the table surface and the fixture base. This clearance preserves conversational eye contact while focusing illumination onto your tablescape.
Over kitchen islands, allow thirty to thirty-four inches above the countertop for optimal prep utility. This positioning prevents physical head strikes and keeps the overall visual composition balanced.
For open living room walkthroughs, keep fixture bases at least seven feet above finished flooring. This height clearance satisfies standard architectural requirements while establishing an unimpeded sense of openness.
Pay attention to the suspension mechanism when adjusting fixture hanging heights. Stiff rigid metal downrods deliver a clean, architectural finish that limp exposed cords cannot match.
If using braided cloth cords, install tension weights or straight drop guides to prevent unsightly cord bends. Straight, crisp lines convey professional installation and thoughtful design precision.
Calibrating your drop heights aligns ceiling lights with structural sightlines and functional zones. Balanced vertical alignment creates an immediate impression of custom architectural forethought.
In stairwells or double-height foyers, position multi-tiered pendants so their lowest point clears the upper landing rail. This placement anchors the vertical shaft without clipping the sightlines of ascending guests.
Always view the fixture from seated and standing positions before making your final electrical cuts. Making these physical adjustments on site prevents costly rewiring and awkward hanging heights later.
Precise vertical hanging ties your ceiling illumination directly to the human experience of the space. Perfect suspension turns an ordinary pendant into an anchored architectural sculpture.
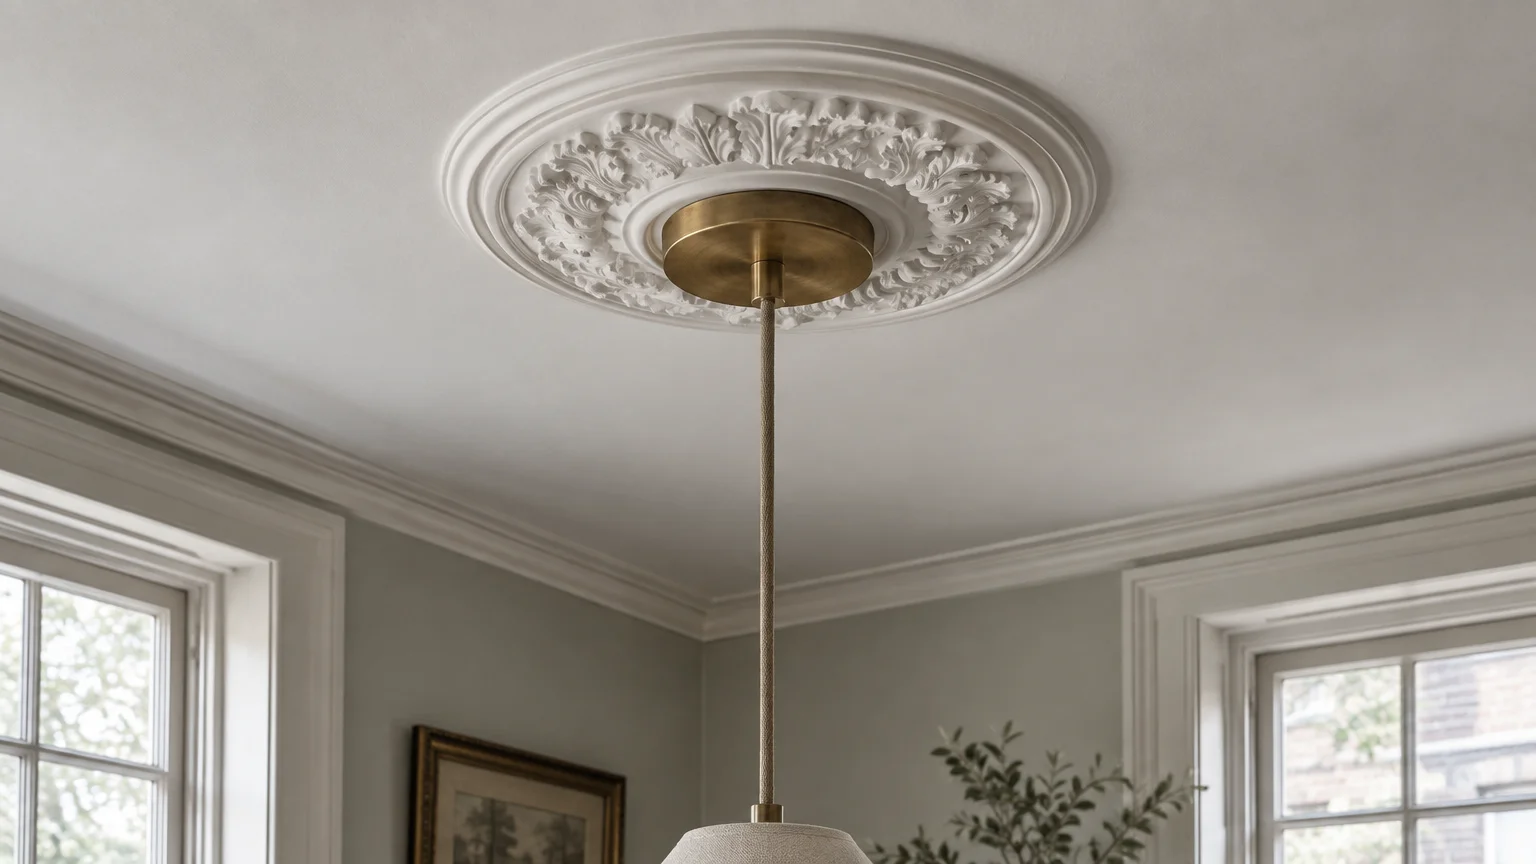
Trend #7: Ignoring Architectural Canopy and Medallion Integration
Builder-basic junction boxes often leave awkward gaps or flimsy canopy covers exposed on the ceiling. Ignoring this transitional junction draws attention to raw drywall cutouts and messy hardware.
Classical and historic homes benefit dramatically from the installation of tailored ceiling medallions. A polyurethane or hand-cast plaster medallion frames your fixture and establishes refined historic gravitas.
Scale your medallion diameter to match both fixture width and overall room proportions. A medallion should extend slightly beyond your chandelier’s perimeter to achieve optimal visual harmony.
In contemporary and minimalist spaces, opt for flush, trimless canopy kits that integrate seamlessly into sheetrock. Recessed backplates eliminate clunky mounting rings, creating a sharp, modern appearance.
Paint the fixture canopy in the exact hue and sheen as your ceiling surface. This discreet visual trick lets the cord or downrod emerge effortlessly from the plane above.
When lighting interacts smoothly with crown molding, beams, and ceiling planes, spatial cohesion flourishes. The fixture feels like an integral architectural element rather than an arbitrary addition.
Thoughtful canopy treatments showcase the fastidious detailing that distinguishes luxury design from generic renovation. Finishing the connection to the ceiling completes your overall design vision.
In rooms with structural ceiling beams, align junction boxes along central wood axes or coffer recesses. Mounting fixtures haphazardly across asymmetrical beam bays creates persistent visual tension overhead.
Concealed mounting hardware transforms even moderate lighting designs into tailored, architectural installations. When connection points look intentional, the entire fixture gains an aura of custom engineering.
Uniting your lighting fixtures with ceiling architecture turns the fifth wall into an expansive canvas of quiet luxury. It remains the ultimate hallmark of a professionally executed interior.
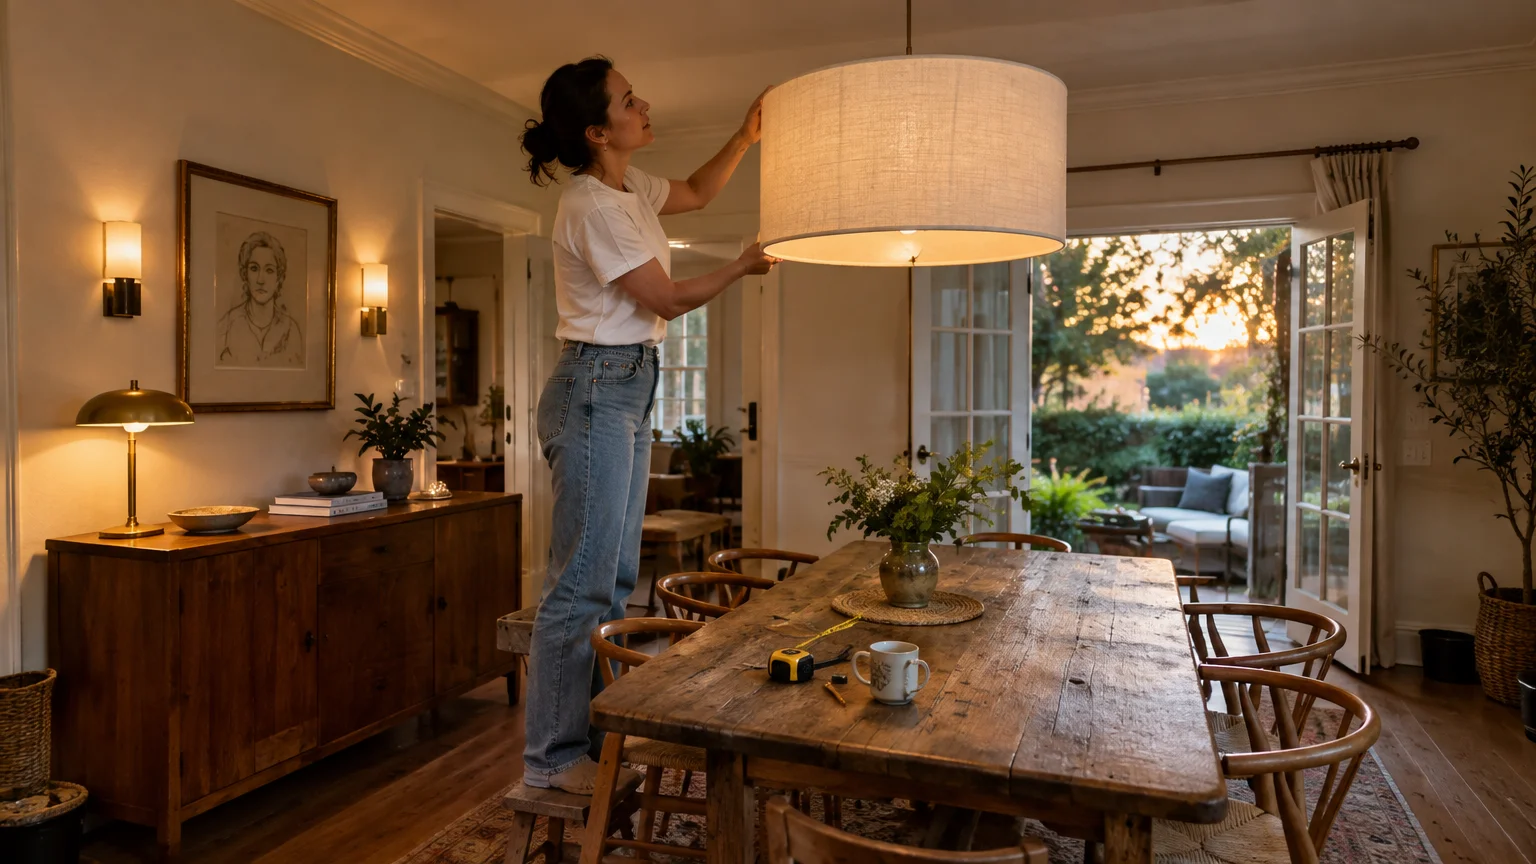
The Big Picture: Weaving These Trends into Your Home
Elevating your home’s lighting requires viewing every overhead fixture through a cohesive lens. Harmonize your ceiling lights with your architectural moldings, wall palette, and flooring materials.
Avoid ordering matching sets of chandeliers, flush mounts, and sconces from a single catalogue collection. Matching lighting suites feels manufactured and lacks the curated soul of bespoke interiors.
Instead, mix harmonious finishes such as aged brass with matte black steel across adjacent living zones. Shared geometric themes and complementary glass textures tie distinct spaces together with refined subtlety.
Balance vintage lighting finds with crisp architectural downlights to establish timeless character and provenance. A vintage Italian pendant paired with modern trimless spotlights yields an effortlessly layered look.
Always map your floor layouts before locking down ceiling junction box placements. Aligning your lighting over actual furniture groupings rather than geometric ceiling centers guarantees deliberate balance.
Lighting choices must also harmonize with your room’s specific paint sheens and undertones. High-gloss ceilings reflect overhead points of light, while flat matte surfaces absorb and diffuse ambient output.
For the latest color forecasts, consult industry leaders like Pantone and paint companies like Benjamin Moore. For professional design standards, refer to the American Society of Interior Designers (ASID).
Treat your ceiling plane as the fifth wall of your room design. Thoughtful illumination flatters high ceilings, draws the eye upward, and enriches every decorative surface below.
Step back to observe your lighting scheme from connecting hallways and threshold entryways. Cohesive visual transitions between rooms confirm that your illumination strategy operates as a harmonious whole.
Disclaimer: This article reflects design trend analysis and predictions. Personal taste and timeless design principles should always guide your decorating choices.
Frequently Asked Questions
How can I make an inexpensive ceiling light look expensive?
Swap cold bulbs for 2700K warm LED options with a high color rendering index. High-quality illumination immediately softens hardware edges and flatters surrounding room surfaces.
Replace clear industrial globes with frosted glass or tailored linen diffusers. These modifications eliminate harsh filament glare and disperse light evenly across your living area.
Add a classic plaster medallion or repaint the canopy plate to match your ceiling finish. These subtle customizations impart a bespoke, built-in presence for minimal investment.
Should ceiling lights match between open-concept living and dining rooms?
They should complement rather than duplicate one another across shared sightlines. Choose one dominant showstopper, like an organic dining chandelier, and pair it with understated living room fixtures.
Maintain consistent metal undertones while varying shapes to achieve cohesive visual interest. This technique creates a curated, collected aesthetic that avoids builder-basic monotony.
Ensure color temperatures remain identical throughout open floor plans to prevent discordant lighting zones. Uniform Kelvin levels tie distinct functional areas into a singular, fluid environment.
What is the most common mistake with recessed pot lights?
Installing recessed fixtures in rigid grid layouts turns beautiful ceilings into airport runways. Overusing downlights creates harsh shadows and eliminates atmospheric intimacy across seating areas.
Position recessed lights specifically to graze artwork, architectural textures, or accent cabinetry. Directing beams toward perimeter surfaces opens up room volume and softens interior boundaries.
Always pair downlights with dimmers and secondary ambient lamps to maintain welcoming balance. Controllable circuits allow you to dial back recessed output in favor of soft lamplight.
How do I know if my ceiling light is too small for my room?
If your fixture appears dwarfed by surrounding furniture or fails to anchor the room, it lacks scale. Add room width and length in feet to determine appropriate diameter in inches.
When in doubt, sizing up slightly provides greater architectural impact than selecting a conservative fixture. Generous fixtures read as intentional design statements rather than builder oversights.
A correctly proportioned fixture draws the eye upward, giving your ceiling plane deliberate purpose and grandeur. Proportional harmony forms the true foundation of luxury interior design.